Pages

Tuesday, September 30, 2014

Fried Green Tomatoes

Yes, I have a boat load of tomatoes around here.  Yes, I really had no business buying more.  Yes, I see canning in my near future.  I just cant help it because the tomatoes are so mazing in the summer and it is almost over.  Sadly.  But then I had to buy those plump green tomatoes at my favorite farm stand at the market- Maier's Farm. After all I need to make fried green tomatoes at least once in a summer, well, fall, really.

Oh yeah!  Oh yeah!  This is like the gazillionth time I have made these and I think I conquered it.  Might I say that I hate the way the house smells after frying.  Hate it!  But these are worth it!  Totally! Is that enough exclamation marks?


Fried Green Tomatoes


Kosher salt
green tomatoes, fairly large (I had four that just fit into my hands)
2 eggs
1/4 cup water
2 cups bread crumbs
1 cup corn meal (fine grain)
peanut oil for frying (use any one you want but it should have a higher smoke point)

Salt the tomatoes pretty generously.  You can rinse them (and probably should). Let them sit for about 20 minutes.  This is really a key step here.  They will not spend enough time in the fryer to really cook so they will be crunch rather than a nice tender inside with a little bit of crunch.

Flour them first, dip in egg wash and then the corn meal/bread crumb mix. I had my own bread crumb mix.  Not that I am amazing or anything but your own bread crumbs are far superior then the store bought ones.  But the store bought one will work too.

While you are doing these first few steps get your pan ready.  I used a heavy iron skillet.  You want about an inch, maybe a little less, of oil.  You want it to be good and hot when you put those green tomatoes in.  When it is the right temp they will be less greasy.  Aim for around 350F.   You should hear sizzle when you put something in.  The sizzle is a good gauge when you do not have a thermometer on hand (ahem, or are too lazy to get one out of the drawer).

Place those bread tomatoes into the hot oil.  Turn when golden. Place on a paper towel lined dish.  Season with salt when they come out of the fryer. Maybe even some garlic powder.

Friday, September 26, 2014

Cassata Italian Cake

I made this a few years ago.  We loved it.  Haven't made it since.  So many new cake recipes to try it was moved to the bottom of the list.  When my brother was in town I thought I would make it since we loved it and he had never tried it.


Cassata Sicilian
Printable recipe here.
makes one 9-inch cake, 10 servings

Sponge Cake Layers
2 cups bleached cake flour, sifted
2 teaspoons baking powder
1 teaspoon salt, plus a pinch
8 large eggs, separated
1 1/2 cups granulated sugar
2 teaspoons pure vanilla extract
1/2 cup (1 stick/4 ounces) unsalted butter, melted and cooled

Rum Soaking Syrup
2 cups granulated sugar
3/4 cup cold water
1/2 cup rum

Cannoli Cream Filling

3/4 cup cornstarch
4 cups milk
1 1/2 cups sugar
1 1/2 tsp almond extract
1 1/2 tsp vanilla extract
1 1/2 tsp cinnamon
1/2 cup shaved chocolate
3 cups ricotta cheese
1/2 cup toasted almonds, toasted
1/2 tsp orange zest

Prepare the filling:
In a saucepan, slowly whisk 1 cup of the milk into the cornstarch. Whisk until smooth. Let sit about 20 minutes.Add the remaining milk and sugar to the milk-starch and stir over a low heat. Continue stirring until it is thick and smooth. Remove from heat. Stir in the almond and vanilla extracts. Place a piece of plastic wrap on the surface of the filling to avoid "skin" and allow to cool to room temperature. Add the ricotta cheese, cinnamon, shaved chocolate, almonds, and orange zest to the the cornstarch.

Stabilized Whipped Cream Frosting

2 cup heavy cream
1/4 cup powdered sugar
1 1/4 tsp powdered gelatin dissolved in 3 Tb. cold water

Preheat the oven to 350°F and position a rack in the center. Lightly grease two 9-by-2-inch round cake pans with butter or nonstick cooking spray, line them with parchment paper, then grease the parchment.

Sift together the cake flour, baking powder, and 1 teaspoon salt into a medium bowl and set aside.

In the bowl of an electric mixer fitted with the whisk attachment, beat the egg yolks and sugar on medium speed until very light and pale yellow in color and doubled in volume. Beat in the vanilla extract, followed by the melted butter. Transfer the egg mixture to a large, clean mixing bowl. Fold in the dry ingredient-quickly and lightly, stopping just before they are fully incorporated. Clean the whisk attachment and mixing bowl.
Place the egg whites and the pinch of salt in the cleaned bowl of the electric mixer. Using the whisk attachment on medium-high speed, beat the egg whites until firm peaks form. Fold the egg whites into the batter quickly and lightly, incorporate any streaks of dry ingredients that remain.

Evenly divide the batter between the prepared pans, rap the pans against the counter top to eliminate air bubbles. Bake for 35 to 40 minutes, or until they are golden brown, a cake tester inserted in the center comes out clean, and the cakes have begun to pull away from the sides of the pan. Allow the cakes to cool for 5 minutes in the pan. Run a knife around the perimeter of the cake then carefully remove the cake from the pan.  Set the cakes out to cool on a a wire rack.

While the cakes are cooling, prepare the rum syrup: In a medium saucepan, stir together the sugar, water, and rum. Place the saucepan over medium heat and bring the contents to a boil. Lower the heat and allow the syrup to simmer for 5 minutes. Remove from the heat and let it cool.

Assembling the cake: Have ready a 9-inch springform pan. Using a serrated knife, carefully split each cake layer in half horizontally to make four layers. Place one of the layers in the bottom of the pan and, using a pastry brush, moisten it generously and evenly with some of the rum syrup. Spread the cake layer evenly with one third of the ricotta mixture. Repeat twice with another cake layer, more of the rum syrup, and another third of the ricotta mixture. Place the final cake layer on top and generously brush with the rum syrup. Wrap the springform pan tightly in plastic wrap; this helps the layers fit snugly on top of each other. Chill the cake in the refrigerator for at least 4 hours or overnight.

Whipped Cream Frosting:
In the bowl of a stand mixer fitted with the whisk attachment, whip the cream with the sugar until soft peaks. Meanwhile, heat the water in the microwave until warm. Sprinkle the gelatin over top. Let cool. Slowly pour the gelatin in one steady stream over the whipped cream and continue to whip until firm.

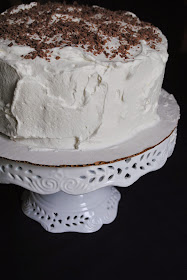
Decorate your cake with the whipped cream and chocolate shavings over top (if desired).  Return the cake to the refrigerator to chill until you are ready to serve it, at least 3 hours.

Tuesday, September 23, 2014

Pasta with Roasted Pepper Sauce

Today, while my brother was visiting, we took a ride over in the Finger Lakes region of New York.  I like to go to a few Mennonite stores there.  I buy a few things there that are hard to find in other places.  Like a 50 pound bag of flour.  Yes, I know, you are thinking that is HUGE.  You are right it is, but if you bake bread, you go through it quite quickly.

Since I hear this is going to be a rather cold winter again, I am thinking I will be making bread on a regular basis and may not get back there for a while.  I don't know, I say that, and then I always end up going back in a couple months anyway when there is a break in the weather.  

This pasta is delicious.  A but sweet so it is totally a good idea to sprinkle some Asiago over top to offset the sweetness. We also enjoyed the pasta mixed with tomatoes as the acid offset the sweetness of the pepper sauce as well. 

If you have two components, which I did, this recipe is stinking easy to whip up.  I suppose tomato soup would work in a pinch.  Combined with roasted red peppers.

I roast some peppers every year around this time.  I stash them in the freezer.  Boy, are they good on a sandwich! In the winter time that sure is appreciated by me. I had a jar of them in the refrigerator.

roasted peppers
tomato sauce

You could totally make this with store bought stuff.

If you want to get all domestic though, do this:


Tomato Soup


2 quarts tomatoes
1/4 cup butter
1/4 cup flour
4 cups milk
1 large onion, diced

Core and peel some tomatoes.  Place them quartered, in a large soup pot.  Cook them down until they are pretty soft.

In a frying pan fry onions in butter.  Continue to saute for about five minutes, just until the onions are transluscent.  Add in flour.  Be patient.  You want the flour to begin to brown.  This is what gives a nice rich flavor.  Once your flour clumps are golden, whisk in milk. Continue to whisk until all the clumps melt.  Bring to a boil, lower heat and simmer for one minute.

Meanwhile puree the soup, either in the blender or with an immersion blender. 

Pour the milk mixture into the tomatoes.  Season with salt and pepper.

Done!

Roasted Peppers


On a cookie sheet.  Place in oven and broil.  You want the pepper skin charred all the way around.  Check and turn often.  It gets real hot so you have to watch this process pretty close. 

As soon as one pepper gets done place immediately in a pot with a cover or a bowl with a cover.  The steam will help the pepper seperate from the skin.

Once you are all done roasting then you have to peel the skin off.

Yes, it is an exhausting process but worth evey little effort later on.  The flavor is WAY better than the jarred kind in the store.  By the way, do not run it under any water when peeling.  You will lose flavor.  Yes, the little seeds will drive you crazy.

Once you peel it all, cut in strips, season with salt and pepper, a little olive oil and a little red wine vinegar.  Let sit overnight for maximum flavor.  If you can stand waiting that long.

Saturday, September 20, 2014

Canning Tomato Sauce


Wash, core and take off any spots on tomatoes.  Quarter them and place in large stock pot.  Once your pot is about half full put it on the stove on low heat.  Once the tomatoes start to give up their juice then you can turn the fire up to medium high.

Keep adding tomatoes to it until you are about 3/4's full.  Bring it to a slow simmer and let cook until the tomatoes begin to fall apart.  Remove from heat.

Working in small batches run the tomatoes through the blender.  Pour through a strainer to separate the seeds and skin from the juice. 

Pour juice into cleaned and sterilized jars.  Fill jars 1/4 inch from top.

Once you have your seven jars ready for the canner, add them into the warm water of the canner.  Bring to a boil and process for 30 minutes.  Once the time is done, turn off the heat, remove the lid and leave the jars in the canner water.  This will prevent the boiling over of the hot liquid.  Once that five minutes are done remove the jars to cool.  Make sure each jar top is "depressed".  If you press in the center of the lid, it should not bounce back.  It can take a little while to seal sometimes.  I usually check the next morning.  Any that do not seal should be refrigerated and used up.

Tips and Tricks

Once you get your pot about half full put it on the stove so the tomatoes can start breaking down. Stir frequently as they will easily stick at this point. Add as you cut.  The tomatoes in the pot will take up less space as they lose their juice.  Keep adding tomatoes, they will cook faster being surrounded by the hot liquid of the cooked tomatoes.

Cook tomatoes fully.  It will be easier to break them down in the blender and then strain them if they are nice and soft.

Have your canner all hot and ready.  You do not want to add the hot bottles to cold liquid.  You will run the risk of shattering the bottles.  Hot liquid in bottles, hot liquid in canner is a winning combination.  Well, at least not a shattering one.

Blend the tomatoes before straining.  Blend thoroughly. 

Tuesday, September 16, 2014

BEST Chocolate Cake


This is a really good chocolate cake.  Even though there is only a half cup oil, it is super moist and light.  It is not a dense chocolate cake.  It has tons of flavor.  I highly recommend it.

I decided to go with a mint chocolate cake for my birthday.  Yes, I make my own cake.  You see, I like making cakes.  I love making exactly what I want for my birthday.  I think it is kind of a foodie thing. Yes? 

Best Chocolate Cake- Ever!


2 cups sugar
1 3/4 cup flour
1 cup cocoa
1 1/2 teaspoons baking powder
1 1/2 teaspoons baking soda
1 teaspoon salt
1/2 cup oil
1 cup milk
2 eggs
2 teaspoons vanilla
3/4 cup boiling water

Line two 9 inch cake pans with parchment paper and grease the sides. Preheat oven to 350F.

In a large bowl whisk together flour, sugar, cocoa (sift it in), baking powder, baking soda and salt.

In a 2 cup measuring cup or a smaller bowl, measure milk, oil, eggs, vanilla.

Pour the liquid ingredients into the dry ingredients. Beat just enough to mix.  Make sure you scrape the bottom and sides of the bowl.  Add in boiling water. Beat briefly scrap and stir.  Pour into prepared pans and place on the middle rack of the oven.

Bake 40 to 50 minutes. Cool for ten minutes in pans. Flip and peel off paper.

Mint Frosting

1 cup butter
3 cups confectioners sugar
1/4 cup Creme de Menthe

Beat together until light and fluffy.  Add more or less sugar until desired affect is achieved.  Like wise add the Creme de Menthe.

Thursday, September 11, 2014

Pickled Jalapenos


SOOOOOOOOO good.  I made four jars plus a little one to go in the fridge the first time.  I loved them- ate half the jar with my dinner, so I decided to can some more.

Here is what I know about jalapeños and what has worked for me and not worked for me.   A few years ago I canned jalapeños, sliced, with lots of seeds.  These were so hot!  I can barely eat one with a whole meal.  Just five will turn a whole pot of beans into fire.  Seriously.  This time when I canned them, I only allowed a few seeds.  I would slice them and whatever would remain on the slices I would leave.  The main heart of seeds at the core I discarded.  It was totally enough heat for me.  You will have to play with the seed thing to discover your own level of heat.

Always wear protective hand cover.  I use a latex glove on the hand holding the jalapeño while chopping.  Be careful not to inhale fumes while cooking.  It will hurt your lungs.

So far I have canned 7 pints of these.  I have some jalapenos in a bag in my fridge about to be canned as well.  I love these!

I have wrote the recipe for 3 pints.  Double it if you would like more.  Maybe even triple it if you are loving them like me.

Pickled Jalapeño Slices 

Makes about 3 jars- pint size.

2 1/2 cups jalapeños, sliced, most of seeds discarded
1 clove of garlic for each jar

brine:
1 1/2 teaspoons mustard seeds
1 1/2 teaspoons peppercorns
1 1/2 teaspoons cumin seeds
1 1/2 cups white vinegar
1 1/2 cups water
3 tablespoons Kosher salt or non iodized salt

In a stainless steel saucepan heat salt, water, vinegar, mustard seeds, cumin seeds and peppercorns until it comes to a boil.  Simmer one minute and remove from the heat.

Slice and core the jalapeños.  Place in jars. Press firmly as you go along to get as many as you can into a jar.  Don't smash them though.  Once all your jars are packed, pour brine into the jars filling them up to within one quarter of the top of the jar.  Place lids on, screw tops down and place in hot water bath.  Process 10 minutes.

Tuesday, September 9, 2014

Preserving Herbs

Here is what I do with my herbs.

Basil: In a blender, I combine 2 cups of basil (packed) to one cup of olive oil.  I then pour it into ice cube trays or baby food jars.  When I need it I just pull out a cube and add it to soup right before serving.  Pow! Lots of basil flavor!

Cilantro:  I don't preserve this because it is so delicate of a flavor.  If you really want to I would use the "basil" method.

Dill:  Freeze this in baggies.  Wrap the dill in paper towel, then plastic, then aluminum foil and label. Note: if you have a vacuum sealer, then by all means use that.

Lavender:  Tie stems with twine and hang in dark dry place. Once dried remove leaves from stem.  Discard stem and place leaves in air tight glass jar.

Mint:  Tie stems with twine and hang in dark dry place. Once dried remove leaves from stem.  Discard stem and place leaves in air tight glass jar. Note: The best time to pick mint is in the spring, early summer. As the summer goes by mint becomes tougher.


Oregano:  Tie stems with twine and hang in dark dry place. Discard stem and place leaves in air tight glass jar.

Rosemary:  Freeze a few stems in baggies. Wrap the rosemary in paper towel, then plastic, then aluminum foil and label. Note: if you have a vacuum sealer, then by all means use that.

Thyme:  Tie stems with twine and hang in dark dry place. Discard stem and place leaves in air tight glass jar.

Saturday, September 6, 2014

Canning Peaches: A Step by Step Process

I have been canning peaches since I was a kid.  Ahem, well, assisting my Mom as a kid.  Peaches are a little very messy and with all that sugar, a little very sticky too.

First, prepare light or medium syrup. I prefer light syrup. Simply heat water and sugar in a sauce pan until sugar dissolves. Bring it to boiling point and boil one minute, making sure all sugar is dissolved.


  • Light – 2 cups sugar to 1-quart water
  • Medium -3 cups sugar to 1-quart water

I did a bushel last time, yielding 21 quarts.  I needed just under 5 quarts of water/ 10 cups sugar.

Second, scald the peaches.  They don't need to be in there real long- a minute or less will do.  This part will loosen the skin of the peaches and take the fuzz away.  If your peaches are really ripe the skin will come off easily without this.  But really ripe peaches make for soggy canned peaches. Some kinds of peaches give up their skin easily, others do not. Unfortunately the ones below did not give up their skin to easily.  Note to self buy the first freestone peaches that are out at the market.
When doing a lot of peaches I lay them out on a cookie sheet to cool while I peel them. 
Third, Place peeled, sliced and cooked peaches into a jar.  Pack them in pretty good without smushing them too much.  Pour hot liquid into the jar.  Wipe rims to make sure there is not any stuff on it.  Place lids and screw on the rings. Give a nice firm, twist. Place in hot water in canner.

Fourth, bring canner to a boil. This is called the water bath. Once it has reached the boiling point, time it for 20 minutes.

Here is one tip that will save you some effort and a lot of time.  After you have processed your peaches, let them sit in the canner for five minutes with the lid off and the heat turned off for five minutes.  After that, pull the tray up and then remove your jars from the canner.  This step will prevent bubbling over.  If you take the jars out right after you turn the heat off, they sometimes will bubble over, creating a hot, sticky mess.

I place my jars onto a glass cutting board.  I never place them directly on the counter.  If I am canning a lot I will place them on heavy towels.

Another little tip is to place any hot pads that you might have gotten wet, onto the jars while they are cooling.  The heat from the jars will dry them out real quick.

I leave them out all night on the counter.  The next morning I make sure that all the tops are depressed making sure they have been processed adequately.  Then I clean the jars.  In recent years I actually remove the ring, clean it real well and store without the rings.

If any of your jars did not seal properly, place them in the fridge and eat them up! Honestly, this does not happen very often.

Wednesday, September 3, 2014

Zapple Bars

Summer is winding down here at our house.  Even though I know there are roughly 18 days left... What I mean by winding down is that the flurry of activity is coming to a close (at least with the kids). For me it is all about the harvest now and spending many days in the kitchen freezing vegetables and fruit or canning them.  While I love it and love the fact that I have it in the winter even more, all I want to do is sit down with my sewing machine and sew.

The day I made these bars I was literally in the kitchen the entire day with all my produce from the Farmers Market! Phew!  These bars were totally worth the extra time that I had to be there to make them.  You would NEVER know it was zucchini.  If you carefully peel all the green off, no one will have a clue.  And this is a good thing because my daughter is not exactly keen on zucchini.  The slight pale green that is under the skin is okay because it is kind of like a green apple. This recipe was a lot of fun because it was like an experiment.


ZAPPLE BARS
Source: The Classic Zucchini Cookbook , by Nancy C. Ralston, Marynor Jordan, and Andrea Chesman.

A very nice lady at the farmers market told me about these bars.  I had to try them.

The filling:
6 cups zucchini, peeled and diced
1/2 cup fresh lemon juice
2/3 cup packed light brown sugar
1 teaspoon ground cinnamon
1/4 teaspoon nutmeg
1/3 cup Dutch Jell ( you could use corn starch or tapioca or some other thickener)

The crust:
2 1/2 cups all-purpose flour
1 1/4 cups granulated sugar
1/2 teaspoon salt
1 cup unsalted butter, cut into pieces

In a nonreactive saucepan, combine the zucchini and the lemon juice. Bring to a boil over medium-high heat. Reduce the heat and simmer until tender, about 10 minutes. Add the brown sugar, cinnamon, and nutmeg. Simmer, stirring, for 1 to 2 minutes, until slightly thickened.

Preheat the oven to 350F. Butter a 9- by 13-inch baking pan.

To make the crust, in a food processor combine the flour, sugar, and salt. Add the butter. Process or combine until the mixture resembles coarse crumbs. Press half of the crust mixture into the prepared pan. Bake for 10 minutes.

Spread the zucchini mixture evenly over the crust. Crumble the remaining crust mixture evenly on top of the zucchini. Bake for 35 to 40 minutes, until golden brown.

It is delicious served like a crumble while still warm.  If you want bars, then serve after it is completely chilled.