Pages

Sunday, December 31, 2017

Raspberry Rugelach


This year, instead of making 10,000 cookies, yes, that many, I decided to change it up a bit.  I asked my kids, husband and Mother which cookie they want most.  My daughter chose Rainbow Cookies, my other daughter chose sugar cookies, my husband chose cinnamon buns and my Mom chose rugelach.  Many years ago I made rugelach and it had cream cheese in the dough.  I could not find that recipe but found this one instead.  I liked it. I did add about a 1/4 cup more of flour though to the dough.  I also used regular saltine cracker crumbs (less salt) to the filling instead of bread crumbs, but other than that, followed it, pretty much to the letter.


I only had two of these.  I gave all that remained to my Mom.  I really must make it again.  It's so good and perfect with tea or coffee.
 

RUGELACH
This recipe is largely based on this recipe at Serious Eats, click here.

4 1/4 ounces all-purpose flour (about 1 cup, spooned; 118g), plus more for dusting
4 ounces cold unsalted butter (8 tablespoons; 115g), cut into large cubes
4 ounces cold cream cheese (8 tablespoons; 115g), cut into large cubes
1/8 teaspoon Diamond Crystal kosher salt; for table salt, use half as much by volume or use the same weight

filling:
1 ounce (about 1/4 cup) almonds, toasted and finely chopped
1 tablespoon granulated sugar
2 tablespoons fresh bread crumbs
1/2 cup raspberry jam, homemade or a good-quality store-bought brand
1 egg yolk whisked with 1 teaspoon (5ml) cool water
1 teaspoon sparkling sugar


For the Dough: In the work bowl of a food processor, combine flour, butter, cream cheese, orange zest, and salt. Pulse 4 to 5 times, then turn the processor on and process until the dough forms a shaggy ball, about 1 minute.

Transfer dough to a lightly floured sheet of plastic wrap and lightly flour your hands. If making crescent cookies, gently form a disk 5 inches in diameter. If making sliced cookies, form dough into a 3- by 4-inch rectangle. Dust surface with flour and wrap tightly. Lightly press with a rolling pin to smooth, then lightly tap the disk or rectangle's edges on the counter. The smoother the edges, the less prone they will be to cracking later on. Chill until the dough registers 40°F (4°C) on an instant-read thermometer, about 1 hour. The dough may be frozen for 3 months; defrost overnight in the refrigerator to proceed.

Preheat oven to 375°F (190°C). Line baking sheets with parchment paper.

For the Filling: Pulse crackers until fine.  Empty out into a bowl.  Add the almonds to the processor and process until crumby but not like bread crumbs crumby.  The stage just before. Add those to the bowl with the cracker crumbs. Then add raspberry jam.
 
On a lightly floured surface, roll dough into a 4- by 12-inch rectangle. Spread filling over surface of dough using an offset spatula, leaving a 1/2-inch border along the two 12-inch edges.  Starting at one 12-inch edge, tightly roll dough into a spiral. Place roll on baking sheet and chill for at least 30 minutes. Place seam side down, using a sharp knife cut roll into 12 cookies, in narrow triangular wedges.  You can freeze these at this point.

Brush cookies' surface with egg wash using a small pastry brush. Sprinkle with sparkling sugar. Bake cookies until browned and flaky, about 22 to 25 minutes. Some filling may squish out; that’s okay. The bottoms of the rugelach should be caramelized, not blackened. Transfer the cookies (still on the parchment) to a rack to cool completely, about 1 hour. Store in an airtight container, layered between sheets of wax paper, for up to 3 weeks, or freeze for up to 1 month.

Saturday, November 25, 2017

PUMPKIN WHOOPIE PIES


What side of the pumpkin patch do you stand on?  As far as I am concerned, anything pumpkin is awesome.  Whether it is a decoration, kitchen item, food or a picture.  I love, love, love pumpkins.  Sweet or savory!  Yes!

I know everyone gets sick of seeing ten million pumpkin recipes in the fall on Pinterest.  Not me, bring it on baby.

If you are that person that can't stand pumpkin anything, then you are probably not even reading these lines.  If you are, then you probably want to move along because I am about to deliver some amazing pumpkin deliciousness in the form of a recipe.
PUMPKIN WHOOPIE PIES

3 cups all-purpose flour
1 tsp. salt
1 tsp. baking soda
1 tsp. baking powder
2 tbsp. cinnamon
1 tsp. ground ginger
½ tsp. ground nutmeg
1 cup granulated sugar
1 cup dark brown sugar, firmly packed
1 cup canola oil
3 cups chilled pumpkin puree
2 large eggs
1 tsp. vanilla extract

Preheat oven to 350°F

Mix dry ingredients and set aside.  Blend wet ingredients and add the dry to the wet.  Spoon or pipe on to greased baking sheets, heaping tablespoons for small or 1/4 cups measurements for large. Bake for about 15 to 20 minutes.  It really depends on the size of your 'pies'.  You can test them with a toothpick.

Once they have completely cooled, frost with your favorite frosting.  I did the following

8 ounces cream cheese
4 ounces butter
1-2 tablespoons milk
3 cups give or take of confectioners sugar
pinch of salt

Sunday, October 29, 2017

Barb's Carrot Cake


I acquired this recipe when I was working as a Home Health Aide, about 30 years ago.  I was working for this amazing woman who had a child with Cystic Fibrosis.  She needed overall help.  This woman helped to shape my life.  She made all of his baby food by freezing dinner items in ice cube trays and then into storage bags in the freezer.  When I later had my children, long before it was the 'in' thing to do, I did the same thing.  She baked her own bread and shared a few of those recipes with me.  She had down comforters, I ended up buying down comforters for my beds.  There was so many ways that she impacted my life, in a good way, I couldn't begin to tell you all of it.  I admired her so much.

This is an homage to her, Barb, for being such a great role model!

Barb's Carrot Cake

This time I added a combination of apple butter and applesauce so my cake was darker than usual.

2 3/4 cups flour
2 cups sugar
3 teaspoons baking soda
2 teaspoons cinnamon
1 teaspoon nutmeg
1/2 teaspoon salt
1 2/3 cup apple sauce
1 teaspoon vanilla

4 eggs
3 cups shredded carrots
1 cup chopped walnuts
1 cup raisins
3/4 cup oil

In a mixer or a bowl mix apple sauce, vanilla, oil and sugar.  In a separate bowl mix dry ingredients, flour, baking soda, cinnamon, salt and nutmeg. Mix into the wet ingredients and then add eggs one at a time until incorporated. Finally add the raisins, carrots and walnuts.

Pour mixture into a greased 9 x 13 pan with high sides and bake @ 350° for 35 to 45 minutes.  But I found it can take an hour. You will know it is done when a toothpick inserted in the center comes out clean.

Frost with cream cheese frosting or as desired.

Tuesday, August 8, 2017

Tea Time Tuesday: Lemon Loaf Cake

Have you ever wondered what the difference is between a sweet bread and a tea loaf?  I have.  But then I wonder about all kinds of things that most people could give a darn about.  I'm weird like that. Deal.

A tea bread by Oxford Dictionary is. "A type of cake, baked in the shape of a loaf, containing dried fruit that has been soaked in tea before baking. ... 'Another bread, bara brith, is at least as good as any other fruit loaf or tea bread.  

Then I looked up sweet bread and it was nowhere near what I thought the definition of sweet bread was.  According to Wikipedia it is, "Sweetbread is a culinary name for the thymus or the pancreas, especially of calf and lamb, and, less commonly, of beef and pork."  What???? Seriously.

Then what the heck is a cake type loaf called?  Cake? Yes, loaf cake, now don't I feel foolish.  So if you are anything like me in my naivete, then dont write a post about tea bread and what not.  Its a loaf cake, fool!  Its just that simple.

Anyway, this lovely loaf is awesome with a cup of tea.  Head on over to my friend, Sandy's blog, Quilting For The Rest Of Us and see what she has in store for you for tea.
Lemon Loaf Cake

Makes 1 large loaf and one small loaf

3 cups flour
1/2 teaspoon baking powder
1 teaspoon baking soda
1 teaspoon salt
1 1/2 cups sugar
2 tablespoons fresh lemon juice
zest of one lemon
1 teaspoon vanilla
1 cup oil
3 eggs
3 cups zucchini
1 teaspoon oil

Preheat oven to 350°F.  Stir together all the dry ingredients except for the sugar. In another bowl, beat together the eggs and sugar, then oil, lemon juice, zest and vanilla. Pour the wet into the dry and beat just until combined.  Stir in the grated zucchini.  Pour into greased loaf pans and bake for 45 to 55 minutes.

Saturday, August 5, 2017

Charcoal and Tea Tree Soap with Tamanu Oil


Doesn't that bubble look like a beetle with enormous eyeballs?
I have made soap once, so, I was afraid to make this soap, Activated Charcoal Soap, especially after seeing all the comments about some fails underneath the post on Soap Queens Blog.  You can access that post here.

I bought some activated charcoal a year or so ago.  I have a lot of it.  We have used it a few times for tummy aches and let me tell you, it works like a charm.  It's bizarre though to eat something black, takes some getting used to.  I just mix a teaspoon or two with a little bit of applesauce.


I changed it up just a wee bit and added some peppermint oil.  It smells so good!  I am pretty excited about the outcome, isn't it a beautiful soap?

Charcoal and Tea Tree Soap with Tamanu Oil
This is the recipe I used, please see Soap Queens recipe here.

1.8 oz. Castor Oil (5%)
9 oz. Coconut Oil (25%)
14.4 oz. Olive Oil (40%)
9 oz. Palm Oil (25%)
1.8 oz. Tamanu Oil (5%)
5.1 oz. Sodium Hydroxide Lye
10.1 oz. Distilled Water (15% water discount) 
1.7 oz. Tea Tree Essential Oil and Peppermint Essential Oil combination
2 tablespoons activated charcoal

Slowly and carefully add the lye to the water and gently stir until the lye has fully dissolved and the liquid is clear. Set aside to cool. 

Melt the castor oil, coconut oil, olive oil, palm oil and tamanu oil (remember to fully melt the entire container of palm oil before portioning out). When the lye water and the oils have cooled to 130 degrees or below (and are ideally within 10 degrees of each other), add the lye water to the oils and stick blend until thin trace. 

Sprinkle 2 tablespoons of activated charcoal to the soap mixture distributing in a fine all over layer on top to reduce clumps. Without turning it on use your stick blender to stir the charcoal into the soap batter. Slowly pulse the stick blender to incorporate the charcoal. 

Add the tea tree essential oil to the soap, and use the stick blender to blend and stir the essential oil until completely mixed in. 

Continue to stick blend for just a few seconds, to make sure the ingredients are completely combined. When the soap is a medium trace and is still pourable, pour the batter into your soap mold. Tap the mold on the counter to even the soap and get rid of bubbles. 

Spray the top of the soap with 99% isopropyl alcohol to prevent soda ash. Place on a heating pad set to medium heat, and insulate the soap for about 30 minutes. Turn off the heating pad, and leave the soap insulated for 24 hours. 

Allow the soap to stay in the mold for at least 3-4 days. Because this soap has plenty of soft oils, it may need up to a week in the mold. Don't rush it! When the soap is firm enough, unmold and allow them to cure for 4-6 weeks. 

Friday, July 21, 2017

Pumpkin Bundt Cake

My husband and I have switched over to a plant based, vegan diet mainly for health benefits.  If you read my blog, you know we are meat eaters.  My husband being a major meat eater.  But we have always had meatless meals before they started gaining in popularity.  This has helped us a lot.  We were already enjoying great bean burgers.  And please, please, please, if you have never had homemade, it is a completely different experience.  Don't judge all bean burgers like you judge the one in the box from the store.

Since the day after Mothers Day (Mothers Day was the day I made this cake) we have been 95% vegan).  We have not eaten any meat but there may have been some parmegan on our spaghetti a few times.  We have lots of it to use up. If a recipe calls for an egg, I use an egg but we no longer have eggs for breakfast.  Our egg consumption has about 15 every week to less than one.  I am not going to ever be 100% probably, but mostly, yes.

I started a new blog, check it out.  It is called VEEG. My daughter named it.  It's all about my husband and I stepping into a vegan, plant based life.

What will happen to Lori's Lipsmacking Goodness.  Well, I probably will post here when I make things for my kids or for pot lucks, things that will not be appropriate for Veeg.  So Lori's Lipsmacking Goodness will go on, albeit, with fewer postings.


PUMPKIN BUNDT CAKE
Recipe adapted from Taste of Home.  You can find the original here on the net.

2 cups sugar
1 cup canola oil
3 eggs
3 cups all-purpose flour
2 teaspoons baking soda
1 teaspoon ground cinnamon
1 teaspoon ground nutmeg
1/2 teaspoon salt
1/4 teaspoon ground cloves
1 can (15 ounces) solid-pack pumpkin

*sugar glaze drizzle of confectioners and sugar mixed together about the consistency of a thin pancake batter or heavy cream.

Preheat oven to 350°. In a large bowl, combine sugar and oil until blended. Add eggs, one at a time, beating well after each addition. Combine flour, baking soda, cinnamon, nutmeg, salt and cloves; add to egg mixture alternately with pumpkin, beating well after each addition. 
Transfer to a greased bundt pan. Bake 60-65 minutes or until toothpick inserted near the center comes out clean. Cool 10 minutes before inverting onto a wire rack. Remove pan and cool completely. Dust with confectioners' sugar. Yield: 12-16 servings. 

Originally published as Pumpkin Pound Cake in Country Extra November 1999, p49 

Nutritional Facts (Since I reduced the sugar content the carbs and sugar values would be slightly lower)
1 slice: 351 calories, 15g fat (2g saturated fat), 40mg cholesterol, 245mg sodium, 51g carbohydrate (32g sugars, 2g fiber), 4g protein.

Wednesday, July 12, 2017

Some Simple Summer Salads

Using that delicious dill dressing, you can add it to your potato salad as a mayonnaise alternative.  It makes for a great salad.  I used the dressing I made from the previous post, found here and added onion.

The night we had the potato salad, I also made some roasted asparagus and tossed it with mini tomatoes, some balsamic, garlic powder, S&P and oil.   It was heavenly! A simple summer salad idea for yah.

Saturday, July 8, 2017

Dill Mustard Sauce


Last summer, at Ikea, I picked up a bottle of their delicious mustard dill sauce!  Insert a choir of angels here and the heavens opening with light and joy.  Love this stuff, its a Swedish sauce called,  HovmästarsÃ¥s, it is incredible.  I was hooked but with Ikea two hours away and in another country, yes, that's the closest one to me, I had to find another alternative.  Behold, the amazing internet.  After looking at a few recipes, and they are really simple, I came up with my own interpretation.  I have a bit more dill than most recipes.  But I really like the dill. AMAZING stuff. Picture it if you will in a potato salad. I am picturing it and I will be making it tonight!

Dill Mustard Sauce

1/4 cup Dijon Mustard
1 tablespoon Grainy Mustard
1 tablespoon cider vinegar or white wine vinegar
2 tablespoons vegetable oil
2 generous tablespoons honey
1/4 cup fresh dill, chopped finely

Whisk together the Dijon, oil, vinegar and honey.  Drizzle in oil, whisking constantly.  It will emulsify easily because of the honey.

Tuesday, July 4, 2017

STRAWBERRY SALAD DRESSING


So many changes here at Lori's.  As you can tell I have been off my 'game', unable to keep up with the demands of this blog as I learn to balance, children, career, home, marriage, friends... Yeah! I am struggling.  As I know many of you are with the same issues.  I know I am not alone in this boat.  Or maybe it is a ship, as the people on board are vast in numbers.  Mostly women.  Not that there are not men who "do it all".  If my husband was reading this, he'd say, what?  Of course I do a lot.  And he does, but ladies, you know, it ain't the same.  We pick up the slack on things like the kids doctors visits to whose cleaning up the dog mess.  Seriously! I don't want to get into the whole gender thing cause this is not what this post is about.

What's it about?  My absence and the changes and hopefully somewhere in this verbiage, what can be done about 'balance'.  I hate to sound all depressing here but balance is an enigma. When you really look at it, it flies in the face of reality.  Before you can ever reach balance, you have to strip away things from your life to simplify.  You can keep 100 balls flying in the air.  Maybe you can manage 5.  Maybe it's 3.  Be fair to yourself.  Don't be hard on yourself.  You can not create balance and 'om' with so much to do.  Sometimes in life, you will need to run from fire to fire.  Managing the flames so they don't scorch anyone.  Goodness.

Be kind to yourself.  There is so much on your plate these days.  We have so many conveniences and opportunities but the list of choices is giant.  Your time needs to be put on a budget.  Let me speak in first person here.  Let's do the calculations here. There are 24 hours in a day, 7 days a week. That's 168 hours.  Less sleeping time, and I like to get 8 if I can (and really we all should strive for nearly that). That's 56 hours.

168 hours
- 58 sleep time
110
- 35 work hours for me
75
-5 for commute
70
-16+ household chores, cooking, cleaning, gardening, etc. (also very conservative)
54
-3  errands, grocery shopping, banking, oil changes (this is definitely a conservative figure.)
51
-4  personal grooming, showers, blow drying hair, make up, etc
47
-3  exercise (yes, I know, this should be mroe, but right now I am nursing a sore knee)
44
That's a little over 6 hours a day. Most of that time chiming in on the weekend.  Thinking of no other obligations, like children and parents, this is how many hours are left to do whatever.  To balance your hobbies, spending time with the people you love, reading a bool, taking a class, whatever.  It goes real fast so you have to spend it wisely.

Okay so I didn't tackle what to do about balance.  Except maybe have an appreciation for all I do and give myself a break.  I want to keep Lori's Lipsmacking Goodness going.  I am going to do my best.

Here is a way to spend less than five minutes to make yourself a seriously wholesome and tasty salad dressing that will be sure to please you while you are eating your next salad.

STRAWBERRY SALAD DRESSING
It s a decent thickness but if you want to set it up a little add a teaspoon of chia seeds.

¼ cup olive oil
½ cup cider vinegar
2 tablespoons honey
5 good size strawberries, stems removed
1 tablespoon poppy seeds
½ teaspoon salt

In a blender combine all ingredients and blend until emulsified.  I didn't even drizzle in oil, didn't need to.  Put it in my Magic Bullet and boom! Done! And it stayed emulsified.

Sunday, May 28, 2017

SKILLET PEAS and POTATOES


This is a quick meal.  Super quick. Not much chopping involved either. It is meatless, in fact, it is Vegan.  But, more importantly, it is delicious.  How can you go wrong with potatoes?  Certainly if you don't care for coconut and you consume milk, you can replace with milk, just be careful about the burn factor.

This recipe is complete with substitutions.

Disclaimer:  The photo above was taken a little but before it was finished.  Once it was finished, it was like a mob scene.  No chance for photo ops.  Shhh.  I did get to steal some away for my lunch the next day before anyone else even had a taste.

SKILLET PEAS and POTATOES

1 pound small potatoes
1 cup peas
1 medium onion, chopped
2 teaspoon vegetable oil
4 Roma tomatoes, chopped
1/2 can or 1 cup of coconut milk
2 teaspoons Garam Masala*

In a large skillet pan or Dutch oven place your small potatoes or chopped potatoes, add about an inch of water and some salt.  Cover and cook until potatoes get fork tender.  If there is a little water in the pan let it cook out by taking off the lid, if there is still quite a bit, drain and return the potatoes to the pan.  Add in chopped onion and vegetable oil along with the garam masala.  Let the onions cook a little.  Add chopped tomato, peas and a half of a can of coconut milk. Make sure you scrape the bottom to incorporate those brown tasty bits.

*If you are not a fan of Indian food you can replace the spice with one of those spike mixes such as Montreal Steak seasoning or Rosemary garlic.  

Tuesday, May 23, 2017

Chocolate Peanut Butter Cheesecake

Tea time will be back soon.  I am sconed out at the moment and needed a breather from all that scone baking, In the mean time, I bring you this lovely cheesecake.  Swoon.

Some time ago it was my husbands birthday.  We celebrated with some delicious chocolate peanut butter cheesecake. I made a few mistakes but in the end it was okay.

One of the mistakes I made was that I overfilled the water.  When I make cheesecake, at least in recent times, I put it in a water bath.  I find the cheesecake to be more moist and it bakes better.  You will see this idea in a lot of recipes. It helps with not getting that infamous crack on top.
You need to have a piece of foil large enough to cover the bottom of your cheesecake.  I find that the standard foil here in the US is narrow, not wide enough to get a nice seal on the bottom of a 9" round. Most times I do not have the wider heavy duty foil.  If you want to do the water bath I recommend getting the wider foil.

The other mistake I made was not putting enough of the batter mixed with the peanut butter.  It got too thick and dint go on the cheesecake evenly.  Also the chocolate portion was dulled by too much batter.  Next time, half and half.  This will make the chocolate portion of the cheesecake more chocolatey and the peanut putter portion more pourable and spreadable.

Yes, there will be a next time because it still was good.

Chocolate Peanut Butter Cheesecake

crust
1 cup finely ground chocolate wafer cookies (4 ounces)
2 tablespoons unsalted butter, melted
2 tablespoons sugar

filling
4 ounces semisweet chocolate (55 to 61 percent cacao), finely chopped
4 packages (8 ounces each) cream cheese, room temperature
1 1/2 cups sugar
Pinch of coarse salt
1 teaspoon pure vanilla extract
4 large eggs, room temperature
1/2 cup smooth peanut butter

Preheat oven to 350°F.  Grind chocolate wafer cookies into crumbs, mix with melted butter and sugar. Line bottom and a little up the sides of a 9 inch round cheesecake pan, Bake for 10 minutes.  Remove from oven.

In a mixing bowl place cream cheese and sugar and salt.  Blend together for about 3 minutes.  Add in vanilla.  Add in eggs one at a time, mixing after each one. Scrape down sides. Mix just until blended. Divide batter in two.

In the same mixer with half the batter, add peanut butter and blend until combined.  Pour into a bowl and set aside.  Melt chocolate in bain marie or microwave, making sure just to heat it until it melts. In that same mixer combine the reserved half of batter and add in the chocolate.

Pour the chocolate batter into the prepared crust cheesecake pan.  Spoon peanut butter batter over the top. Smooth.  Place in oven on center rack.  Bake for approx. one hour and 10 minutes.  Keep an eye on it.  You want it to be slightly jiggly in center before you take it out.

This following alternate way of baking is not necessary but it will yield a very moist cheese cake.

If you would like to bake it the way I did (ensuring that you cover the bottom better than I did), cover the bottom of cheesecake pan in foil, making sure it is tight around.  Place in in a larger baking pan. Pour in some water to the larger baking pan (under the cheesecake pan) about an inch.  It should not be anywhere near the top of the foil on the cheesecake pan.  Once the cooking time is complete, open the oven door a crack and let the oven cool to room temperature before removing the cheesecake.

Tuesday, May 9, 2017

Tea Time Tuesday: Blueberries


This week Sandy from Quilting From The Rest Of Us chose blueberries as our theme.  Head on over to her blog and you can learn about some awesome blueberry tea.  I personally love blueberry tea. Pour me a up Sandy!

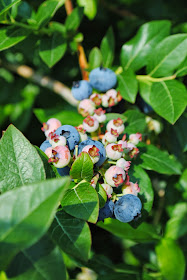
I feel like I should write an ode to blueberries because they are so much a part of my life.  Every year we cant wait to go picking blueberries.  We have made a picnic out of blueberry picking for at least 11 years.   This weeks "flavor" is extra special to me.

I did not make any scones this week out of blueberries. I just plain ran out of time but I am going to show you three of my favorite blueberry recipes that are from the past.  They have been made more than once in this house.

The first is blueberry tart.  This tart is slammin' jammin' blueberry rich.  It has kind of a blueberry jam beneath and then fresh blueberries on top.  It's SOOOOO good.


Blueberry Tart 
Longbotham, Lori. 'Luscious Berry Desserts'. Chronicle Books. San Francisco: 2006.
Recipe found here at Joy of Baking
Pastry:
1 1/2 cups (210 grams) all-purpose flour
1/2 teaspoon (2 grams) salt
2 tablespoon (25 grams) granulated white sugar
1/2 cup (1 stick) (113 grams) unsalted butter, chilled, and cut into 1 inch (2.54 cm) pieces
1 large egg
1/2 teaspoon pure vanilla extract
1 - 2 tablespoons ice water
Filling:
2 1/2 cups fresh blueberries
1/4 cup (50 grams) granulated white sugar
1 1/2 tablespoons (20 grams) all purpose flour
Garnish:
2 1/2 cups fresh blueberries
Confectioners (powdered or icing) sugar

Pastry: In your food processor, place the flour, salt, and sugar and process until combined. Add the butter and process until the mixture resembles coarse meal (about 15 seconds). In a small bowl, whisk the egg and vanilla. Then gradually pour in a steady stream, with the motor running, through the feed tube until the pastry just holds together when pinched. Add water, if necessary. Do not process more than about 30 seconds.

Transfer the pastry to an 11 inch (28 cm) fluted tart pan, and press evenly over the bottom and up the sides of the pan. Cover and place in the refrigerator while you prepare the blueberry topping.

Preheat the oven to 425 degree F (220 degree C).

In a large bowl combine the sugar and flour. Add 2 1/2 cups of fresh blueberries and toss to coat. Remove the chilled pastry from the refrigerator and evenly pour in the blueberries and sugar/flour mixture. Place the tart pan on a large baking sheet and bake for 15 minutes. Reduce the oven temperature to 350 degrees F (180 degrees C) and continue to bake until the pastry is golden brown (about 30 - 35 minutes). (Halfway through the baking time, stir the berries if there is any flour on them.) Remove from oven and place on a wire rack. Top with the remaining 2 1/2 cups of blueberries (crown side up), pressing them gently into the hot blueberry jam. I like to make concentric circles with the blueberries, starting at the outside edge. Let the tart cool to room temperature before serving. Dust with powdered sugar and serve with softly whipped cream or ice cream. Cover and store leftovers in the refrigerator.


Makes one - 11 inch (28 cm) tart.

This one is a huge pain to make but well worth it.

Fruit Squares
My Great Aunt was apparently a caterer. This recipe comes from her.  This recipe is one of the things she use to serve.

3/4 cup lard or vegetable shortening
4 cups flour
1 cup sugar
4 teaspoons baking powder
1/2 teaspoon salt
3 eggs
3/4 cup milk
1 teaspoon vanilla

filling of our choice (you can make your won or buy the canned pie filling)

In a large bowl beat shortening/lard with sugar.  Add eggs, milk and vanilla.  In another bowl combine flour, salt and baking powder.  Add the flour mixture into the wet ingredients.  Wrap in plastic wrap and chill in the refrigerator.

After dough chills, roll out half of dough and lay in an ungreased 15-x10-inch baking sheet. Spread pie filling over it.  Roll out remaining half and place over filling or you can make a lattice top by cutting in strips and laying over top of filling, pinching the edges as you go.
Roll out dough between wax paper.  It is very sticky. If you want to make your life a little easier, chill the dough for 20 minutes before pulling the wax paper off.  Place dough on jelly roll pan about 10 x 15. Bake at 350F until golden and pulling away from the sides a little, about 30 to 35 minutes or until lightly browned. Cool. Cut into bars or squares.

And finally this one. Can if in the summer and enjoy it all winter long.  We did!  Pour this all over your crumpets...


Blueberry Syrup
Ball Canning Recipe here.

8 cups blueberries, crushed (about 3-1/2 lb)
6 cups water, divided
1 tablespoon lemon zest
3 cups granulated sugar
2 tablespoons lemon juice

Place blueberries, 2 cups of the water and lemon zest in a large stainless steel saucepan. Bring to a gentle boil over medium heat and boil gently for 5 minutes.

Pour into a strainer lined with several layers of cheesecloth set over a deep bowl. Let drip, undisturbed, for at least 2 hours.

When ready, heat water canner to boiling. Heat jars in warm water until ready for use. Do not boil. Wash lids in warm soapy water and set bands aside.

Mix sugar and remaining 4 cups water in a clean large stainless steel saucepan. Bring to a boil over medium-high heat, stirring to dissolve sugar, and cook until temperature reaches 230°F, adjusting for altitude. Add blueberry juice. Increase heat to high, bring to a boil and boil for 5 minutes, stirring occasionally. Remove from heat and stir in lemon juice.

Using a large measuring cup pour hot blueberry syrup into hot jars leaving 1/4 inch headspace. Wipe rim. Center lid on jar. Apply band until fit is fingertip tight.

Process jars in a boiling water canner for 10 minutes*, adjusting for altitude. Remove jars and cool. Check lids for seal after 24 hours. Lid should not flex up and down when center is pressed.


*Please remember to not time your canner until it is boiling.

Tuesday, May 2, 2017

Tea Time Tuesday: Crumpets


I have always wanted to have tea and crumpets.  It just sounds so... English.  So proper. So dainty.  I am none of these things.  But a girl can pretend, right.  Tea time is about pretend sometimes.  Like when I was a little girl.  Or the tea parties you see on television.  Like the popular commercial of the rough and tumble guy having tea with his sweet little daughter.  I would love to share the video of that one with you but can not find it on the internet. This one is kind of cute though...


The crumpets were pretty easy.  The hardest part was standing at the skillet cooking them up.  I sprayed wide mouth jar rings with cooking spray and used those as my molds.  You could use empty clean tuna cans, with bottom cut out as well.

Crumpets are a lot like an English muffin.  Taste is kind of plain.  Its all about what you put on them. They are a vehicle to flavor.  Some butter and jam- perfect.  All those nooks and crannies soaking in the yum.

This week my book to tell you about is Dark Witch, by Nora Roberts.  It's one of three, Shadow Spell and finally, Blood Magick.  Maybe I should wait to tell you about it when I read all three.  Nah...  I will forget by then.  Book one.  I love a tale of Witches.  Maybe its the feminine power thing.  Maybe it's the magic that captivates me.  This book has it all.  It is set in County Mayo, Ireland.  Romance and mystery is woven in the story leading you on through the book.  At times it can be a bit kitschy, but I don't mind.
Dark Witch (The Cousins O'Dwyer Trilogy, #1)
If you are drinking your tea alone then, pick up a book and have a relaxing moment with your tea and crumpets.  Or if you are lucky enough to have a friend like Sandy, sit down and join that person for tea.  Head on over to Quilting For The Rest Of Us to see what Sandy is pouring this week in "our tea cups" this week.

CRUMPETS
Mostly from this recipe at Serious Eats.

2 1/2 teaspoons instant dry yeast
1 teaspoon sugar
2 3/4 cups,water
3 cups (15 ounces) all-purpose flour
1 teaspoon kosher salt
2 tablespoons powdered milk
1 teaspoon baking soda

Mix all the dry ingredients together and then add the water, mixing until well incorporated.  It will be a lot like pancake batter but it holds together.  Let it rest for an hour.

Coat griddle with nonstick cooking spray or oil.  Spray rings and place on griddle.  Pour batter into the ring, not filling it up- about a 1/4 cup.  Cook about 5-7 minutes on one side before turning.  It should be golden.  Push down on the crumpet to release it from the ring and flip.  Cook just long enough to make the raw go- not golden*. When pushed it should spring back.  Let cool and, of course, serve with tea, butter and jam.

*Packaged crumpets are white on one side.

Tuesday, April 25, 2017

Tea Time Tuesday: Blackberry Lime Scones

It's Tea Time Tuesday again.  This week I am putting Blackberry Lime scones on the virtual table with my dear friend Sandy.  Pour me a cup my friend!  What are you brewing this week Sandy? I think it is blackberry tea.  hmmmm.

I have no book review this week because I was all last minute with this post.  Nice weather kept me from doing stuff inside yesterday. Except for cooking and, ah hem, baking ... blackberry lime scones.

No words this evening as my bed is beckoning.  Night night!


BLACKBERRY LIME SCONES
2 1/2 cups flour
2 teaspoons baking powder
1/3 cup sugar
1/2 teaspoon salt
4 ounces or 1 stick cold butter
1/2 cup plus 2 tablespoons milk
1 egg
2 teaspoons lime zest
1 cup blackberries

glaze
2 tablespoons lime juice 
1/2 cup to 1 cup confectioners sugar

Blend together the dry ingredients, including the lime zest.  I like to use my processor for this but its not necessary.  You can use a bowl and a pastry blender or a fork.  Blend in the cold butter until it turns the flour kind of mealy. In a separate bowl stir together the wet ingredients.  Stir the wet into the dry just until combined.  Spoon into a scone maker or even ramekins.  You can also pat into a round and cut into 8 pieces.  Bake at 400° for about 20 minutes.

Remove from pan after cooling for 5 minutes.  Drizzle glaze over top.

Thursday, April 20, 2017

Kale and Cannelini Bean Soup with a Ham Hock


I got into making soup with ham hocks when I lived in AZ in the mid 90's.  It all started with a recipe for posole.  I couldn't find oxtails at the time so it could have been oxtails that I got into.  I did find ham hocks and it was a great discovery for me.  I have been using them ever since.  Recently, my friend Sandy (from Quilting For The Rest Of Us), turned me on to the ham hocks at an Amish (or should I say, Mennonite) store near where we live.  Great discovery!  Best ham hocks ever!
Soup Tip:  If you make soup a lot you probably already know this.  Most soups are way better the next day when the flavors have had a chance to marry. This comes in handy when you are having a large gathering.  Its something you can do ahead of time.

KALE, CANNELINI AND HAM HOCK SOUP

1 large ham hock
2 large bay leaves
1 large onion (about a cup and a half), chopped
4 carrots, peeled and chopped
2 large potatoes (about 2 cups), peeled and chopped
1/2 to 1 pound of kale, cleaned and chopped
2 cloves garlic, minced
1 pound cannelini beans
2-3 quarts chicken stock
1 1/2 teaspoons seasoned salt
1/2 teaspoon black pepper
1/8 teaspoon cayenne (optional)

In a soup pot, soak beans overnight.  Drain in the morning and add a ham hock and chicken stock to the beans, cover and cook on low heat (just barely simmering) until beans are nearly tender.  Add in carrots, potatoes, garlic, kale, cayenne, salt and pepper. Cook until carrots and potatoes are tender.

Tuesday, April 18, 2017

It's Tea Time Tuesday: Double Chocolate Scones


It's tea time again with my good friend Sandy of Quilting For The Rest Of Us. This week we decided to get all dessert on you.  Chocolate!  Click on over to Quilting For The Rest Of Us to check out some amazing teas from Sandy.  

My book this week is The Dog Who Saved Me by Susan Wilson.  It's a heart warming story of a wounded policeman who is in the throws of a trauma from the beginning of the book.  The dog's story is interwoven with the man.  The author takes you into the man's despair and the dogs struggle. Together they learn to trust, to the greatest extent possible.  
The Dog Who Saved Me

Double Chocolate Scones
No glaze needed on these.  Dunked in some tea... heavenly


2/3 cup half and half cream 
1 large egg, lightly beaten
1 teaspoon pure vanilla extract
1 3/4 cups all purpose flour
1/4 cup Dutch-processed unsweetened cocoa powder
1/2 cup granulated white sugar
2 1/2 teaspoons baking powder
1/4 teaspoon salt
1/3 cup cold unsalted butter, cut into small pieces
2/3 cup chocolate chips

Preheat oven to 375°F.

In a food processor or bowl, combine dry ingredients, mix well.  Add in the butter pieces. Blend until the mixture looks like sand or as they say, mealy.  In a separate bow mix in the vanilla, half and half and egg.   Add wet ingredients to the dry and mix only until it comes together.  Even if there are dry clumps in spots, better to pull it out of the processor and knead it together.  Again working it only as much as needed to get together.  Pat into a big round disc and then cut into 8 segments.  I placed them in my scone pan but certainly you can place them on a baking sheet.  Bake for about 20 minutes.  Test with a toothpick if you are uncertain.

Tuesday, April 11, 2017

TEA TIME AND MATCHA COCONUT AND LIME SCONES

It's tea time again with my good friend Sandy of Quilting For The Rest Of Us!  Yeah.  I wish I could have real tea time with her weekly.  But alas, busy schedules prevent such luxuries.  In honor of it being tea time, of course I made scones.


I loved this book!  If I could judge a book by its cover, this was totally right on for me.  The apple and all the tiny lights, magical.  It's a beautiful story of a family of women who all have something very unique about them.  This story is fun and captivating.  The characters are rich.  I love Sarah Addison Allen's characters. (I just finished another one of her books).  She weaves beautiful stories. Very talented.  I am quite sure I will read all of her books.  Here is a link to a blog post that someone wrote about her with a little interview.
MATCHA COCONUT AND LIME SCONES

1/2 cup butter, cold, cut into pieces
1 cup buttermilk
1 egg
1 teaspoon vanilla
2 1/2 cups flour
2 teaspoons baking powder
3 teaspoons matcha powder
1/2 teaspoon salt
1/3 cup sugar
zest of one lime

Lime Glaze:
juice of one or two limes
1 to 2 cups confectioners sugar
lime zest for garnish

Blend together the dry ingredients, including the lime zest.  I like to use my processor for this but its no necessary.  You can use a bowl and a pastry blender or a fork.  Blend in the cold butter until it turns the flour kind of mealy. In a separate bowl stir together the wet ingredients.  Stir the wet into the dry just until combined.  Spoon into a scone maker or even ramekins.  You can also pat into a round and cut into 8 pieces.  Bake at 350° for about 20 to 30 minutes.

Tuesday, April 4, 2017

It's Tea Time With Pumpkin Chai Scones

Me and my friend Sandy of Quilting For The Rest Of Us have teamed up together to do a Tea Time Tuesday Event.  Each Tuesday, Sandy will review a tea from Plum Deluxe Teas and will pair it with one of my scone recipes.  I am crazy over scones!

Check out Sandy's picks for tea this week and check out her BEAUTiful header!
Ladies' Night
I am going to do a book review with mine.  Well, I am going to try and do a book review every time. Today, I want to tell you about Ladies Night , by Mary Kay Andrews.  First, let me tell you what kind of reader I am.  Since I have had children I can't sit still to read a book.  It just isn't happening.  So, if I "read" a book, it's more like I listened to a book on tape riding back and forth to work.  The kind of books I read are light.  Not too heavy.  No serious issues.  The rest of my life is filled with enough serious issues.  Being a social worker does that.  But personally too, I have enough going on.  So when I read... or listen, as the case may be, I like it light.

Ladies Night was right up my alley.  There was a lot going on in the story but the overall flavor of the book was pretty light.  The Ladies Night group, is a group of divorced women who are thrown together in a support group type of setting.  The story is woven together pretty well with a few twists and turns leading you through the tangled mess of divorce/break up.

This is the second Mary Kay Andrews book I have enjoyed.  I am looking forward to listening to the rest of her books.  They are a pleasure to listen to.  I am always so sad when the book ends.  I miss the characters.  They keep me company on my commute to and from work.


Pumpkin Chai Scones

2 cups flour
7 tablespoons sugar
1 tablespoon baking powder
1 teaspoon cinnamon
1/2 teaspoon nutmeg
1/4 teaspoon cloves
1/4 teaspoon pepper
1/2 teaspoon ginger
6 tablespoons butter
3/4 cup canned pumpkin
1 large egg
3 tablespoons cream

Glaze
1 cup confectioners sugar
2 tablespoons cream or milk
1/4 teaspoon cloves
1/4 teaspoon ginger
1/4 teaspoon nutmeg
1/2 teaspoon cinnamon

Preheat oven to 400°F.

Mix dry ingredients together: flour, sugar, baking powder, cinnamon, nutmeg, cloves, pepper, ginger.

Add in butter in small pieces, blend with pastry blender or in a food processor. Flour should become kinda mealy.

In a separate bowl combine wet ingredients, add to dry all at once. Mix just until blended.  Remove from bowl onto a floured surface and pat into a round.  Divide into 8 "pie" wedges.  Place on baking sheet and bake for about 20 to 25 minutes.  They should be just lightly golden around the edges.


Disclaimer:  I received no compensation from Plum Deluxe.  

Thursday, March 30, 2017

BLACK MISSION FIG AND CRACKED BLACK PEPPER BREAD


I have been listening to A LOT of books on tape.  First Frost by Sarah Addison Allen is one of my recent favorites.  The story is sweet and light and everything I needed for a quick escape.  It has a touch of magic. I cant wait to listen to another of her books.

In the book she wrote about fig and pepper bread. I had to make it, I was totally intrigued.  I made it twice now, the first recipe I did was a little dense but that probably was my starters fault, might have been a little depleted and in need of a feeding.  Today I made it again and used my own ideas about it and was happy with the way it came out.   I will definitely make it again.  Today I found a recipe for it from the author.  That was not on my cd , though I heard it was in the book.  I am totally going to try that one next.

BLACK MISSION FIG AND CRACKED BLACK PEPPER BREAD

3 1/2 to 4 cups flour
2 teaspoons Kosher salt
2 tablespoons sugar
1 tablespoon cracked black pepper
4 1/2 teaspoons instant yeast
10 dried mission figs, chopped into pieces*
1 1/2 cups water

Mix flour, salt, pepper and yeast until blended, by hand or with whisk attachment of mixer.
Add the warm water. Then the figs. Knead for 10 minutes, or use dough hook attachment of mixer for 5 minutes, until dough is smooth and springy. Add in a little flour or water by the tablespoon to get it just right.

Oil a large bowl, place dough inside, and cover bowl with a damp hand towel.  Let sit in a warm place for approximately 1 hour, or until dough has doubled in size.


Turn into a Dutch Oven and cover, let rise for 15 minutes.  Meanwhile preheat the oven to 450°F.  Bake covered for 30 minutes.  Remove top and finish baking for another 15 minutes or so.  Check with temperature gage for 190- 200
° F.  Remove from oven, turn out on wire rack. Let sit for one hour.


*My figs were a bit old.  I chopped them up into smaller pieces and poured boiling water over them and let them soak.  I used the soaking water in my recipe, combined with some cool water to bring the temp down.