Sunday, August 31, 2014

Oven Baked Zucchini Chips

I am totally burnt out from summer.  Run, run, run! And then of course because it is harvest time- lots of freezing and canning.  I am not complaining, mind you. I just feel like holing up in my house for a couple weeks.  

Today, I made a pork shoulder for the next few days eating, short ribs for tonight, froze peaches, zucchini dill soup, salsa verde, beets.... um, what else?  Oh, I made some zucchini bars that I will show you on another day. I also cut up a bunch of veggies for a veggie tray to take to a party, mowed my parents lawn and shopped for fabric.  I love productive days like these.  However, I am looking forward to some much needed R and R.

I made these a week or so ago.  I don't mind baking things like this.  Most people prefer frying it. This is less calories and less messy.

Baked Zucchini Chips

2 zucchinis (medium size)
2 cups panko
1 teaspoon garlic powder
1 egg
2 tablespoons milk

Preheat oven to 425F.  Line a few cookie sheets with parchment or a silpat.

Beat egg and milk together in a bowl.  In another bowl place panko mixed with garlic powder.  Slice zucchini 1/4 inch thick. Dip slices of zucchini in egg mixture and then into panko mixture, then place on parchment lined cookie sheet.

Bake until golden, alternating racks.

When you take them our of the oven sprinkle with salt or whatever seasonings you like.

Ranch Dip

1/2 cup buttermilk
1/2 cup mayonnaise
1/2 cup sour cream
2 teaspoons Worcestershire Sauce
1 teaspoon onion powder
1 teaspoon garlic powder
1 teaspoon kosher salt
1 tablespoon dried dill weed (use fresh if you have it)

Mix together, cover and let sit in the refrigerator overnight

Friday, August 29, 2014

Old Fashioned Graham Crackers


I found this old recipe for Graham Crackers.  I have made graham crackers on a few occasions.  This one, in my opinion, is the best one yet.


Graham Crackers

1 cup shortening (you could use half butter and half shortening)
2 cups brown sugar
1 cup granulated sugar
2 cups white flour
4 cups graham flour (or wheat)
1 teaspoon baking soda
2 teaspoons baking powder
1/2 teaspoon salt
1 cup milk
1 teaspoon vanilla

Cream shortening and sugar together until fluffy.  Add in vanilla extract.

In a bowl combine flour, salt,baking powder, baking soda and salt.  Add the dry infredients to the sugar mixture alternately with the milk  Chill dough over night in the refrigerator.

Roll out dough and cut into desired shapes or just squares like store bought graham crackers.  Poke with a fork all over cookie to prevent puffing.  Place on cookie sheet about an inch apart.  Bake in a preheated oven, 350F until golden brown for a crispier cookie. About 12 minutes give or take. If you like them a little soft and chewy take out a bit early.

Wednesday, August 27, 2014

Peachy Pepper Sauce

It's even more orange than it looks here.
I made some hot sauce a few years ago.  I never wrote what I did down I just threw somethings into the pot.  Some tomatoes, some hot peppers, some carrots...  It was kind of what I had on hand along with the other usual suspects, alt vinegar etc.  This time I am making something different.  Not sure how it will come out so I am writing it down just in case I love it and want to recreate it.So far I am loving the flavor of this sauce.  My guess is that it will get better over time.

I have this thing with mango hot sauce.  Since mangoes are not exactly plentiful around here I decided to use the closest thing to it- peaches.  If I had some apricots I would throw them in there as well.  But lets just stick with this so far.

A few tips about making hot sauce

1. The more seeds you put in the hotter it will be.  The seed is the heat center of the pepper.
2. Use stainless steel, ceramic or glass for everything it touches. Its pretty caustic, especially when you add in the vinegar.  It will eat away at plastic and aluminum.
3. Do wear gloves, if you don't have them use a sandwich bag or a plastic bag to protect the hand that touches the peppers.  Don't touch your eyes through out this whole process.  If you got an itch, get a clean towel and use that. Just ask me how I know these things...
4. Cover the pot, this will cut down on the amount of heat going into the air.  The hotter your peppers, the more cautious you need to be about this.  It can burn your lungs, eyes, whatever. Respect the heat!
Cherry Peppers
Peachy Pepper Sauce
Makes about 2 quarts.

1/3 cup chopped garlic
8 cups peaches, peeled pitted and sliced
1 tablespoon kosher salt
1 tablespoon neutral oil
18 cherry peppers ( you can go as hot as you like here- I started out with these)
1 cup onion
1/2 cup carrots
1 cup water
1 1/2 cups white vinegar
2/3 cup sugar
1 teaspoon of ascorbic acid*, citric acid or the juice of half a lemon

In 1 tablespoon of oil sauté onion, carrots and peppers until translucent.  I covered it once it started to really cook.  Too much fumes. One it gets to the point where the veggies are a bit more tender you can add the water, vinegar, garlic, salt and peaches. Let the mixture cook until everything is super soft.  I simmered it, covered, for about 40 minutes.  Add in the sugar and ascorbic acid. Bring to a boil and remove from heat.  I did not can this because I am not 100% sure that there is enough acid in this. I am guessing there is.  I half of it.  The other half is in my refrigerator.  I am thinking it is going to go pretty fast. 

Why ascorbic acid? Basically all this is- is vitamin C.  It helps to maintain the color, preventing browning, at least for a little while.

Monday, August 25, 2014

Creamy Peach Pie


I know my husband likes desserts.  Some he likes, some he loves and some he goes crazy over.  This is one of those "crazy over" kind of desserts.  He said while he was eating it,  "You could just give people a taste of this and then sell it by the slice.  It would go like hot cakes!"  He sat there and talked about how I could make a ton of money over this one particular dessert.  He is too funny.  While I am not going to build a business around this peach pie- I will tell you that I will make it again, for sure, especially when peaches are in season.

I don't usually use premixed kind of stuff but I don't mind buying pudding mix from time to time. However, on my next go around I am going to use a "make your own recipe" for the pudding mix. The recipe for that is beneath the peach pie recipe.
Creamy Peach Pie

1 box of Cook and Serve Vanilla Pudding Mix*
3/4 cup self rising flour
3 tablespoons butter
1 egg
1/2 cup milk

1 28 ounce can of peaches or fresh peaches, skinned, pitted and sliced (about 2 cups)

1 8 ounce package of regular cream cheese (DO NOT use neufatchel cheese)
3 tablespoons peach juice
2/3 cup sugar

1 tablespoon cinnamon sugar

Preheat oven to 350F.  Grease a ten inch pie plate. Drain peaches, reserving 3 tablespoons of juice.

Beat butter and pudding mix together.  Add in egg and milk and last the flour.  Mix until fully incorporated.  Pour into greased 10 inch pie dish.

Lay peaches into the batter in a circle, covering most of the top of the batter.  Don't crowd it too much.

Beat together cream cheese, sugar and reserved 3 tablespoons of peach juice.

Pour over top of peaches within one inch of sides.

Bake for 35 to 45 minutes.  Cool completely, chill and serve.

If you don't have or don't want to buy it-
Cook and Serve Pudding Mix

3/4 cup corn starch
3/4 cup milk powder
1 teaspoon kosher salt
1 vanilla bean scraped ( or just add in vanilla if using in this recipe)

Mix all together.

Saturday, August 23, 2014

Spaghetti Squash with Meat Sauce

One of my favorite light meals for summer time is spaghetti squash.  It is awesome with Alfredo sauce and equally awesome with a nice meat sauce and some asiago cheese.  Heck, just plain sauce is awesome.

Here is how to do it:

Cut spaghetti squash in half lengthwise.

Scrap seeds out with a spoon.

Turn cut side down on a cookie sheet and place in the oven at 350F for about 30 or 40 minutes until soft when touched.

Or you could microwave them cut side down for 11 to 15 minutes.  You want it to give a little when pressed.  It may harden if the squash is older.  If so, turn it over and check to see if it is baked.

Take a fork and beginning at the outer side, scrap the fork, drawing it to the center.  The flesh will come away from the sides in strings. Keep working around the squash until it is all pulled away from the sides.

Heap onto a plate and cover with sauce and sprinkle with your favorite cheese.  Mine is asiago.

Thursday, August 21, 2014

Maple Date Bars

Maple Date Bars


1 3/4 cups finely chopped pitted dates (about 12 ounces)
3/4 cup water
1/3 cup maple syrup
1 teaspoon grated lemon rind

2/3 cup sugar
6 ounces or 3/4 cup or 1 1/2 sticks butter, softened
1 1/2 cups all-purpose flour (about 6 3/4 ounces)
1 1/2 cups regular oats
1/4 teaspoon baking soda
1/4 teaspoon salt


In a saucepan, combine dates, water, and maple syrup in a heavy saucepan over medium heat. Bring to a boil. Gently cook for 12 minutes or until most liquid is absorbed, stir frequently.  Stir in lemon zest; cool completely.

Preheat oven to 400°. Grease a 13 x 9 pan. 

In a large bowl beat sugar and butter with a mixer at medium speed until smooth. In a separate bowl, combine flour, oats, baking soda, and salt. Stir flour mixture into sugar mixture (mixture will be crumbly). Press 2 cups flour mixture into bottom of a 13 x 9-inch baking pan coated with cooking spray. Evenly spoon date mixture over flour mixture. Sprinkle with remaining flour mixture. Bake at 400° for 20 minutes or until golden brown. Cool completely in pan on a wire rack.
These are the crazy busy last few days of summer.  Trying to pack the last bits in before its time for school.  The last of the relatively unscheduled days.  The last bits of carefree summer.  The last moments of homework free evenings.  Its bittersweet.  I look forward to some quiet time in the Fall when I can have a few moments to think or get projects done uninterrupted. Or not hearing so much bickering. Contrarily, I am saddened about my kids not being here.  About our time being very scheduled and little time for fun and play. 

Here are some of our last summer bits!  Clifton Hill in Niagara Falls and Niagara Falls, Canadian side.


Monday, August 18, 2014

Blueberry Sauce

This year we went out picking blueberries twice.  Well, to be honest, I think we go out at least twice every year.  For the past 7 years we have made a big even of it.  We would pick berries and then head to the park near by and have a picnic.  There was a little splash area that the kids loved to play in.  Down the street there was even a place for the kids to ride a few kiddie rides.  It was all 25 cents a ride- run by volunteers.  You can read more about it here.

This year, however, my parents are both not feeling up to picking blueberries because of recent health concerns.  My husband could not go because he had to work.  So my kids, my brother and sister in law and I went there on a mission, strictly to pick blueberries.  They would be heading off with their pickings to TN.

My Mother was feeling a little better the following week so we headed back to pick berries.  I actually felt it was a little better the day my Mom and I went alone with the kids.  That was on August 1st.  All the fruits and vegetables were kind of late this year because it was a bit colder here. 

Since my daughter likes blueberry sauce on her pancakes, I made some blueberry syrup. I liked it and she liked it.  I just wish it has more blueberries in it.

BLUEBERRY SAUCE
Ball is my "go to" source for canned goods.  Though I do follow some others, they are my favorite.  Since everyone has been more into canning they have developed even more recipes to suit todays tastes.

Link to recipe

8 cups blueberries, crushed (about 3-1/2 lb)
6 cups water, divided
1 Tbsp lemon zest
3 cups granulated sugar
2 Tbsp lemon juice
3 (16 oz) pint glass preserving jars with lids and bands


  1. COMBINE blueberries, 2 cups of the water and lemon zest in a large stainless steel saucepan. Bring to a gentle boil over medium heat and boil gently for 5 minutes.
  2. TRANSFER to a dampened jelly bag or a strainer lined with several layers of cheesecloth set over a deep bowl. Let drip, undisturbed, for at least 2 hours.
  3. PREPARE boiling water canner. Heat jars and lids in simmering water until ready for use. Do not boil. Set bands aside.
  4. COMBINE sugar and remaining 4 cups water in a clean large stainless steel saucepan. Bring to a boil over medium-high heat, stirring to dissolve sugar, and cook until temperature reaches 230°F, adjusting for altitude. Add blueberry juice. Increase heat to high, bring to a boil and boil for 5 minutes, stirring occasionally. Remove from heat and stir in lemon juice.
  5. LADLE hot Blueberry Syrup into hot jars leaving 1/4 inch headspace. Wipe rim. Center lid on jar. Apply band until fit is fingertip tight.
  6. PROCESS jars in a boiling water canner for 10 minutes, adjusting for altitude. Remove jars and cool. Check lids for seal after 24 hours. Lid should not flex up and down when center is pressed.
 Pretty aren't they?

 Bountiful!

Saturday, August 16, 2014

Banana Bread with a Crumb Topping

Change nothing of this recipe- it is super delicious.My husband exclaimed, I think this is the best banana bread you ever made.  I was a tad bit insulted... But I will take the compliment on the other hand of that statement.

Is it the crumb topping.  I don't know.  I do think it adds a lot.  However, I don't think that is the only reason why it stands out from the others I made.  Honestly I think it is the amount of eggs.  This is really light, Its not dense and it has terrific flavor.
Banana Bread with a Crumb Topping

1 egg
1 cup sugar
1 stick unsalted butter, at room temperature
1 teaspoon vanilla
1/2 cup buttermilk
2 to 3 overripe bananas, mashed (about 2 cups)
2 cups all purpose flour
1/2 teaspoon salt
1/2 teaspoon baking soda
1 teaspoon baking powder
1 teaspoon cinnamon

Crumb Topping:
1/2 cup powdered sugar
1/2 cup all purpose flour
4 tablespoons unsalted butter, melted
1 teaspoon cinnamon
pinch of salt

Preheat oven to 350F.  Grease a large loaf pan or two smaller ones.

Beat together the sugar and butter and beat until smooth and the butter is fluffy.  Add in the egg and vanilla until combined. Beat in the buttermilk and bananas.

In a separate bowl, mix together the flour, salt, baking soda, baking powder and cinnamon. Slowly stir the dry ingredients into the wet until all the flour is incorporated. Pour the batter into the prepared loaf pans.

Make the crumb topping by combining the powdered sugar, flour, cinnamon salt and melted butter. Using your hands, crumble the mixture over the batter in the pan. Bake in a preheated 350 degree oven for 45 - 50 minutes or until a toothpick comes out clean.

Sunday, August 10, 2014

Refrigerator Pickles

I figured I would get this post written because someone had my pickles last year and asked me this year what I put in them.  I didn't remember so I referred to another recipe and made it myself and it wasn't at all similar.  Then I had to think.  The following is pretty much what I probably did last year to make my pickles.  But honestly I have been known to change things up a bit like maybe put in some sugar or even throw in some juice from some store bought pickles that was leftover in the fridge.  I know, like real scientific being all exact, right? 

The only thing I changed this year is adding the mustard seed.  The jalapeño... last year I did some with and some without.


Refrigerator Pickles


2 quarts of water
1 cup white or cider vinegar
2 tablespoons pickling salt
3 to 4 pounds of cucumbers - small pickling cucumbers are best
2 large heads of dill
8 medium garlic cloves, peeled and sliced
1 tablespoon mustard seed
1 jalapeno for a spicy pickle (seeds discarded, unless you like it real spicy then by all means throw them in there)

Boil water, vinegar and salt together.  While that is getting ready to boil, in a clean jar combine jalapeños, cucumbers, dill, garlic and mustard seed. Pour the boiling liquid over the cucumbers and all.  Cover, let sit on the counter at room temp for at least 24 hours and up to two days.  Refrigerate.  They will stay preserved for a while unless of course you eat them all.

Friday, August 8, 2014

Zucchini Bake

 
I made this one day early in the day while it was still cooler. We ended up having something else for dinner.  I think some leftovers that needed to be eaten.  However, over the course of two days, bit by bit- breakfast or lunch, my family ate it.  My husband loved it.  He really does not know this but he has a thing for herbs de Provence.  Well, so do I but I know it.
I know people who read my blog will be asking why did I use Bisquick since I tend to make things from scratch.  Yes, I do try and make what I can from scratch, as time allows... My Mother had this of Bisquick and did not want to use it.  She is not feeling all that great and has no desire to bake.  She gave it to me.  I don't like to waste anything.  

Zucchini Bake

5 eggs, lightly beaten
½ cup vegetable oil
½ cup grated Peccorino Romano cheese or Parmesan
2 generous teaspoons herbs de Provence
½ teaspoon salt
½ teaspoon seasoned salt
¼ teaspoon garlic powder
½ cup finely chopped onion
2 cups Bisquick
3 cups thinly sliced zucchini (a quarter inch or less if you can)

Preheat oven to 350 degrees F. Grease a 9x13 pan and set aside.

In a large bowl whisk together the eggs, oil, cheese, herbs de Provence, salts,  and garlic powder. Whisk in the onion, and then the Bisquick. Stir in the sliced zucchini. Pour into the prepared pan.

Bake until golden, 25 to 30 minutes. Let cool to warm room temperature before serving.


Wednesday, August 6, 2014

Lemon Bars

Lemon bars are kind of old fashioned aren't they?  I remember seeing a recipe for them in my Victoria magazine in the 80's.  I made them and brought them to work. They disappeared.  I dont think I have made them since then.  Geez, has it really been that long since I made them.  I guess so.

This old fashioned dessert pairs nicely with these pics that I am sharing with you.
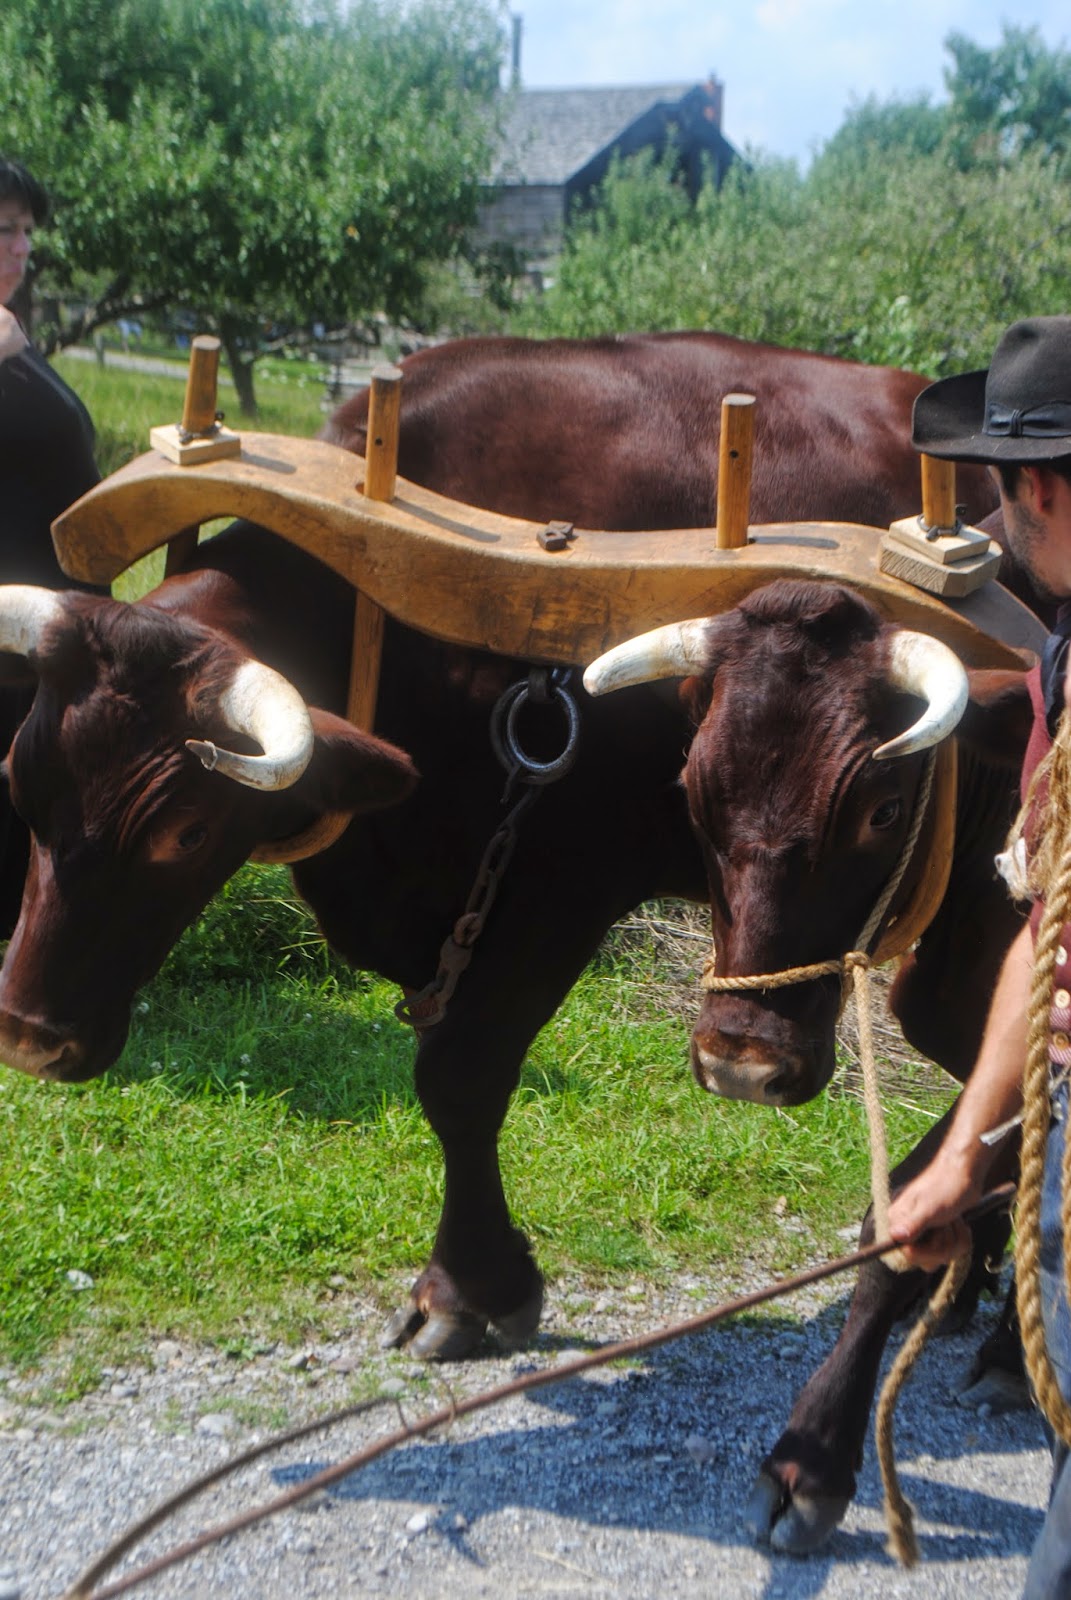
We have the good fortune of living near the Genesee Valley Country Museum.  It is a Village.  It is filled with all sorts of amazing things.  This past weekend they had Laura Ingalls Wilder days.  That was my favorite show growing up.  I think of all the television shows that are out there or were out there- that one really shaped me. Here are a few pics from our day there.


A guy making pickles- little did he know I was about to make some the very next day.
This one here has sauer kraut on the left.  And it just so happens I chopped mine up today- its in the crock now- three huge heads.
 Freshly churned butter mixed with herbs.  A must do for me.
 The oxen- the one on the left has some attitude.
 Some seeds in an old seed package.
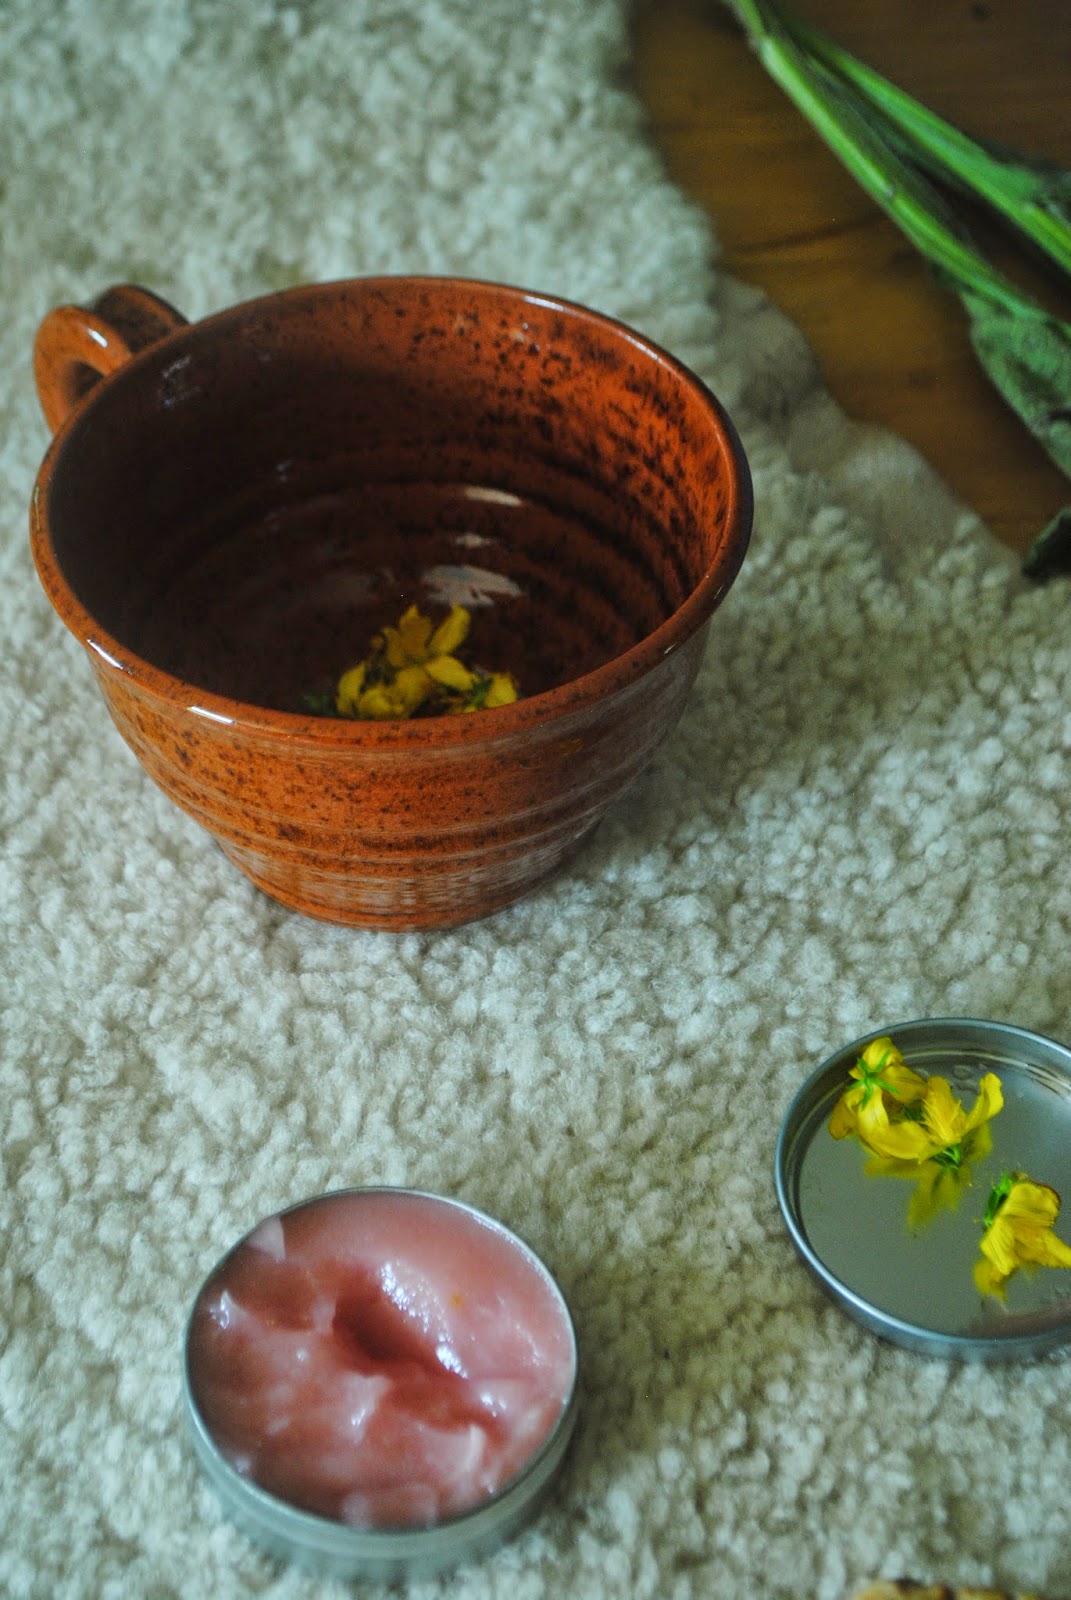
 Some St. Johns Wort and salve.


Lemon Bars


crust:
2 cups flour
1 cup butter
1/2 cup sugar
2 yolks

filling
4 eggs
1½ cups white sugar
⅔ cup all-purpose flour
4-6 lemons, juiced (about ⅔ cup)


Preheat oven to 350F.

Beat butter and sugar together for a few minutes.  Add in yolks, beat until combined. Add in flour and beat just enough to combine.  If it is crumbly, no worries, just press into your 9 x 13 evenly.  Place in a 350F oven for about 15 to 30 minutes.  The crust should be lightly golden.

Pour the filling directly over the hot crust and place it back into the oven for 20 minutes.  Now, I know it is going to look way to jiggly to remove it after 20 minutes but it is done.  As it cools, it will set perfectly.