Last summer I seen these Zucchini Fries on blogs everywhere but I ran out of time. Too many of these 'mock crab cakes' were eaten by me and then I just love zucchini roasted plain. This year I finally tried the fries. Worth every little step to make them. Try it, you'll like it.
ZUCCHINI FRIES
1/4 cup milk
1 egg white
1/2 cup bread crumbs
1/2 cup peccorino romano cheese
2 medium sized zucchini's
Preheat oven to 425°. Cut zucchini into 3-inch sticks.
Whisk an egg white in a small bowl, and add 1⁄4 cup milk.
In another bowl, combine 1⁄2 cup shredded Peccorino Romano and 1⁄2 cup seasoned breadcrumbs in a separate bowl.
Dip zucchini sticks into egg mixture, and then roll in breadcrumb mixture. Coat a baking sheet with cooking spray, and place zucchini on sheet. Bake for 25–30 minutes or until golden brown.
Nutrition:
Calories 64; Fat 2g Protein 4g; Carbohydrate 7g; Sugars 2g; Fiber 1g;
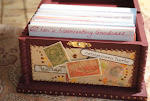
I finally finished this. It started when I saw this idea in a book when I was pregnant with my first child, ahhh, like, 7 years ago. And I began brainstorming how I would make it and not follow all the directions. Why? Because I hate directions, I'd rather get thoroughly frustrated and figure it out myself then take the time to read directions. When my daughter was about 1 I began working on it. I hit a roadblock. I didn't know how to fix my mistake. I put it away. Last week, I pulled it out and finished it up. Perfect or not, it's a completed project. I am all about completing projects and getting rid of stuff that I just dont use anymore. So I am one happy girl. I will be using it for storing hair stuff for the girls. Wahhooo. Done!
Saturday, October 3, 2009
Some unfinished business and zucchini fries to nibble on


Thursday, October 1, 2009
Recipes to Rival: Beef Bourguignon
 Recipes to Rival is at it again. Cooking up a storm with truly amazing recipes- sure to please. How can you go wrong with Julia Child's recipe for Beef Bourguignon? I had just seen the movie when I heard what was going to be this months recipe. Man- I am so glad it was chosen. Apparently I wasn't the only one that was glad. I had my parents over for dinner that night. There was a little left over. My husband gobbled that up at breakfast. The man eats anything for breakfast.
 The stew is really rich. It says it serves six but these are fairly modest portions, so I would accompany it with noodles, rice or potatoes or something, as well as a salad.
Lucky for me when I took the stew out of the oven the sauce was already very thick. I was hoping it would be - whew hooo!
Beef Bourguignon
click here for the original on PDF file from the publisher.
Serves 6
For the Stew
6 ounces bacon, solid chunk
1 tablespoon olive oil
3 lbs lean stewing beef, cut into 2-inch cubes
1 carrot, peeled and sliced
1 onion, peeled and sliced
1 teaspoon salt
1/4 teaspoon pepper, freshly ground
2 tablespoons flour
3 cups red wine (a full bodied wine like Bordeaux or Burgundy or Chianti)
2-3 cups beef stock (Simple Beef stock is posted on the site, unsalted and defatted) 1 tablespoon tomato paste
2 garlic cloves, mashed (you may choose to add more)
1 sprig thyme (or 1/2 teaspoon dried thyme)
1 bay leaf, preferably fresh
For the braised onions
18-24 white pearl onions, peeled
1 1/2 tablespoons unsalted butter
1 1/2 tablespoons olive oil
1/2 cup beef stock salt & fresh ground pepper
1 bay leaf
1 sprig thyme
2 sprigs parsley
For the Sauteed Mushrooms
1 lb mushroom, quartered
2 tablespoons unsalted butter
1 tablespoon olive oil
First prepare the bacon: cut off the rind and reserve. Cut the bacon into lardons about 1/4" think and 1 1/2" long. Simmer the rind and the lardons for ten minutes in 1 1/2 quarts of water. Drain and dry the lardons and rind and reserve.
Pre-heat the oven to 450°F. Put the tablespoon of olive oil in a large (9" - 10" wide, 3" deep) fireproof casserole and warm over moderate heat. Saute the lardons for 2 to 3 minutes to brown lightly. Remove to a side dish with a slotted spoon.Dry off the pieces of beef and saute them, a few at a time in the hot oil/bacon fat until nicely browned on all sides.Once browned, remove to the side plate with the bacon.
In the same oil/fat, saute the onion and the carrot until softened.Pour off the fat and return the lardons and the beef to the casserole with the carrots and onion.Toss the contents of the casserole with the salt and pepper and sprinkle with the flour. Set the uncovered casserole in the oven for four minutes. Toss the contents of the casserole again and return to the hot oven for 4 more minutes. Now, lower the heat to 325°F and remove the casserole from the oven. Add the wine and enough stock so that the meat is barely covered. Add the tomato paste, garlic and herbs and the bacon rind.Bring to a simmer on the top of the stove. Cover and place in the oven, adjusting the heat so that the liquid simmers very slowly for three to four hours. The meat is done when a fork pierces it easily.
While the meat is cooking, prepare the onions and mushrooms and set them aside till needed. For the onion, if using frozen, make sure they are defrosted and drained. Heat the butter and oil in a large skillet and add the onions to the skillet. Saute over medium heat for about ten minutes, rolling the onions about so they brown as evenly as possible, without breaking apart. Pour in the stock, season to taste, add the herbs, and cover. Simmer over low heat for about 40 to 50 minutes until the onions are perfectly tender but retain their shape and the liquid has mostly evaporated. Remove the herbs and set the onions aside.
For the mushrooms, heat the butter and oil over high heat in a large skillet. As soon as the foam begins to subside add the mushrooms and toss and shake the pan for about five minutes. As soon as they have browned lightly, remove from heat.
Finish the Stew: When the meat is tender, remove the casserole from the oven and empty its contents into a sieve set over a saucepan. Wash out the casserole and return the beef and bacon to it (discarding the bits of carrot and onion and herbs which remain in the sieve). Distribute the mushrooms and onions over the meat. Skim the fat off the sauce and simmer it for a minute or two, skimming off any additional fat which rises to the surface. You should be left with about 2 1/2 cups of sauce thick enough to coat a spoon lightly. If the sauce is too thick, add a few tablespoons of stock.If the sauce is too thin, boil it down to reduce to the right consistency. Taste for seasoning.

Tuesday, September 29, 2009
Zucchini and Tomato Tart on a Potato Crust
 The pigs have happily made their debut and I thank all of you for stopping by and saying a thing or two.
Now onto a more nutritious entree. While it may not be the prettiest thing, it is pretty tastey.
Zucchini and Tomato Tart on a Potato Crust
2 cups shredded potatoes
2 eggs
1 teaspoon salt
1/2 cup pecorino romano
1 teaspoon each oregano, basil
2 tablespoons flour
1/2 cup chopped onion
1 teaspoon garlic powder
2 medium sized zucchinis, sliced thinly with a vegetable peeler or mandoline.
4 large tomatoes, sliced thinly
4 oz Fontina
4 oz mozzarella
1/2 cup Pecorino Romano
s and p to taste You start with some shredded potatoes, chopped onion, egg, salt, garlic powder, herbs and Pecorino Romano. Mix in a bowl and place in a sprayed or greased jelly roll pan. Bake at 375F until crusty and golden.
 Add a layer of cheese. I used some Fontina, mozzarella, and some more Pecorino Romano. This layer of cheese helps prevent sogginess from the ingredients that go on top.
 A layer of peeled zucchini and a layer of tomatoes.
 Bake again until the tomatoes begin to dry out. You want this crispiness at the bottom.
Slice and enjoy.
Sunday, September 27, 2009
Daring Bakers: Vols au Vent

The September 2009 Daring Bakers' challenge was hosted by Steph of A Whisk and a Spoon. She chose the French treat, Vols-au-Vent based on the Puff Pastry recipe by Michel Richard from the cookbook Baking With Julia by Dorie Greenspan.
I have visited Steph's blog many times. Always something beautiful and delicious there. Not to mention she is usually full of helpful tips and good info. Go on now, visit her.
I must admit that MOST of my 'vols-au-vent' fell apart, rose too much on the inside but I must take the blame for not properly reading my directions. But I will say, I do so enjoy making puff pastry and working with puff pastry. I liken it to my love for play dough. It's really pretty easy to make and such a pleasure to work with. I have been wanting to make some wee little pigs for my kids. Happily, I made them and happily, they gobbled them.Forming and Baking the Vols-au-Vent
Yield: 1/3 of the puff pastry recipe below will yield about 8-10 1.5” vols-au-vent or 4 4” vols-au-vent
-well-chilled puff pastry dough (recipe below)
-egg wash (1 egg or yolk beaten with a small amount of water)
-your filling of choice
Line a baking sheet with parchment and set aside.
Using a knife or metal bench scraper, divided your chilled puff pastry dough into three equal pieces. Work with one piece of the dough, and leave the rest wrapped and chilled. (If you are looking to make more vols-au-vent than the yield stated above, you can roll and cut the remaining two pieces of dough as well…if not, then leave refrigerated for the time being or prepare it for longer-term freezer storage. See the “Tips” section below for more storage info.)
On a lightly floured surface, roll the piece of dough into a rectangle about 1/8 to 1/4-inch (3-6 mm) thick. Transfer it to the baking sheet and refrigerate for about 10 minutes before proceeding with the cutting.
(This assumes you will be using round cutters, but if you do not have them, it is possible to cut square vols-au-vents using a sharp chef’s knife.) For smaller, hors d'oeuvre sized vols-au-vent, use a 1.5” round cutter to cut out 8-10 circles. For larger sized vols-au-vent, fit for a main course or dessert, use a 4” cutter to cut out about 4 circles. Make clean, sharp cuts and try not to twist your cutters back and forth or drag your knife through the dough. Half of these rounds will be for the bases, and the other half will be for the sides. (Save any scrap by stacking—not wadding up—the pieces…they can be re-rolled and used if you need extra dough. If you do need to re-roll scrap to get enough disks, be sure to use any rounds cut from it for the bases, not the ring-shaped sides.)
Using a ¾-inch cutter for small vols-au-vent, or a 2- to 2.5-inch round cutter for large, cut centers from half of the rounds to make rings. These rings will become the sides of the vols-au-vent, while the solid disks will be the bottoms. You can either save the center cut-outs to bake off as little “caps” for you vols-au-vent, or put them in the scrap pile.
Dock the solid bottom rounds with a fork (prick them lightly, making sure not to go all the way through the pastry) and lightly brush them with egg wash. Place the rings directly on top of the bottom rounds and very lightly press them to adhere. Brush the top rings lightly with egg wash, trying not to drip any down the sides (which may inhibit rise). If you are using the little “caps,” dock and egg wash them as well.Refrigerate the assembled vols-au-vent on the lined baking sheet while you pre-heat the oven to 400ºF (200ºC). (You could also cover and refrigerate them for a few hours at this point.)
Once the oven is heated, remove the sheet from the refrigerator and place a silicon baking mat (preferred because of its weight) or another sheet of parchment over top of the shells. This will help them rise evenly. Bake the shells until they have risen and begin to brown, about 10-15 minutes depending on their size. Reduce the oven temperature to 350ºF (180ºC), and remove the silicon mat or parchment sheet from the top of the vols-au-vent. If the centers have risen up inside the vols-au-vent, you can gently press them down. Continue baking (with no sheet on top) until the layers are golden, about 15-20 minutes more. (If you are baking the center “caps” they will likely be finished well ahead of the shells, so keep an eye on them and remove them from the oven when browned.)
Remove to a rack to cool. Cool to room temperature for cold fillings or to warm for hot fillings.
Fill and serve.
*For additional rise on the larger-sized vols-au-vents, you can stack one or two additional ring layers on top of each other (using egg wash to "glue"). This will give higher sides to larger vols-au-vents, but is not advisable for the smaller ones, whose bases may not be large enough to support the extra weight.
*Although they are at their best filled and eaten soon after baking, baked vols-au-vent shells can be stored airtight for a day.
*Shaped, unbaked vols-au-vent can be wrapped and frozen for up to a month (bake from frozen, egg-washing them first).
 Little pig, little pig, let me in, "not by the hair of my chinny chin chin."
Michel Richard’s Puff Pastry Dough
From: Baking with Julia by Dorie Greenspan
Yield: 2-1/2 pounds dough
Steph’s note: This recipe makes more than you will need for the quantity of vols-au-vent stated above. While I encourage you to make the full recipe of puff pastry, as extra dough freezes well, you can halve it successfully if you’d rather not have much leftover.
There is a wonderful on-line video from the PBS show “Baking with Julia” that accompanies the book. In it, Michel Richard and Julia Child demonstrate making puff pastry dough (although they go on to use it in other applications). They do seem to give slightly different ingredient measurements verbally than the ones in the book…I listed the recipe as it appears printed in the book. To see a video demonstration click the link here: http://video.pbs.org/video/1174110297/search/Pastry
Ingredients:
2-1/2 cups (12.2 oz/ 354 g) unbleached all-purpose flour
1-1/4 cups (5.0 oz/ 142 g) cake flour
1 tbsp. salt (you can cut this by half for a less salty dough or for sweet preparations)
1-1/4 cups (10 fl oz/ 300 ml) ice water
1 pound (16 oz/ 454 g) very cold unsalted butter
plus extra flour for dusting work surface
Mixing the Dough:
Check the capacity of your food processor before you start. If it cannot hold the full quantity of ingredients, make the dough into two batches and combine them.
Put the all-purpose flour, cake flour, and salt in the work bowl of a food processor fitted with a metal blade and pulse a couple of times just to mix. Add the water all at once, pulsing until the dough forms a ball on the blade. The dough will be very moist and pliable and will hold together when squeezed between your fingers. (Actually, it will feel like Play-Doh.)
Remove the dough from the machine, form it into a ball, with a small sharp knife, slash the top in a tic-tac-toe pattern. Wrap the dough in a damp towel and refrigerate for about 5 minutes.
Meanwhile, place the butter between 2 sheets of plastic wrap and beat it with a rolling pin until it flattens into a square that's about 1" thick. Take care that the butter remains cool and firm: if it has softened or become oily, chill it before continuing.
Incorporating the Butter:
Unwrap the dough and place it on a work surface dusted with all-purpose flour (A cool piece of marble is the ideal surface for puff pastry) with your rolling pin (preferably a French rolling pin without handles), press on the dough to flatten it and then roll it into a 10" square. Keep the top and bottom of the dough well floured to prevent sticking and lift the dough and move it around frequently. Starting from the center of the square, roll out over each corner to create a thick center pad with "ears," or flaps.
Place the cold butter in the middle of the dough and fold the ears over the butter, stretching them as needed so that they overlap slightly and encase the butter completely. (If you have to stretch the dough, stretch it from all over; don't just pull the ends) you should now have a package that is 8" square.
To make great puff pastry, it is important to keep the dough cold at all times. There are specified times for chilling the dough, but if your room is warm, or you work slowly, or you find that for no particular reason the butter starts to ooze out of the pastry, cover the dough with plastic wrap and refrigerate it . You can stop at any point in the process and continue at your convenience or when the dough is properly chilled.
Making the Turns:
Gently but firmly press the rolling pin against the top and bottom edges of the square (this will help keep it square). Then, keeping the work surface and the top of the dough well floured to prevent sticking, roll the dough into a rectangle that is three times as long as the square you started with, about 24" (don't worry about the width of the rectangle: if you get the 24", everything else will work itself out.) With this first roll, it is particularly important that the butter be rolled evenly along the length and width of the rectangle; check when you start rolling that the butter is moving along well, and roll a bit harder or more evenly, if necessary, to get a smooth, even dough-butter sandwich (use your arm-strength!).
With a pastry brush, brush off the excess flour from the top of the dough, and fold the rectangle up from the bottom and down from the top in thirds, like a business letter, brushing off the excess flour. You have completed one turn.
Rotate the dough so that the closed fold is to your left, like the spine of a book. Repeat the rolling and folding process, rolling the dough to a length of 24" and then folding it in thirds. This is the second turn.
Chilling the Dough:
If the dough is still cool and no butter is oozing out, you can give the dough another two turns now. If the condition of the dough is iffy, wrap it in plastic wrap and refrigerate it for at least 30 minutes. Each time you refrigerate the dough, mark the number of turns you've completed by indenting the dough with your fingertips. It is best to refrigerate the dough for 30 to 60 minutes between each set of two turns.
The total number of turns needed is six. If you prefer, you can give the dough just four turns now, chill it overnight, and do the last two turns the next day. Puff pastry is extremely flexible in this regard. However, no matter how you arrange your schedule, you should plan to chill the dough for at least an hour before cutting or shaping it.
Steph’s extra tips:
-While this is not included in the original recipe we are using, many puff pastry recipes use a teaspoon or two of white vinegar or lemon juice, added to the ice water, in the détrempe dough. This adds acidity, which relaxes the gluten in the dough by breaking down the proteins, making rolling easier. You are welcome to try this if you wish.
-Keep things cool by using the refrigerator as your friend! If you see any butter starting to leak through the dough during the turning process, rub a little flour on the exposed dough and chill straight away. Although you should certainly chill the dough for 30 to 60 minutes between each set of two turns, if you feel the dough getting to soft or hard to work with at any point, pop in the fridge for a rest.
-Not to sound contradictory, but if you chill your paton longer than the recommended time between turns, the butter can firm up too much. If this seems to be the case, I advise letting it sit at room temperature for 5-10 minutes to give it a chance to soften before proceeding to roll. You don't want the hard butter to separate into chuncks or break through the dough...you want it to roll evenly, in a continuous layer.
-Roll the puff pastry gently but firmly, and don’t roll your pin over the edges, which will prevent them from rising properly. Don't roll your puff thinner than about about 1/8 to 1/4-inch (3-6 mm) thick, or you will not get the rise you are looking for.
-Try to keep “neat” edges and corners during the rolling and turning process, so the layers are properly aligned. Give the edges of the paton a scooch with your rolling pin or a bench scraper to keep straight edges and 90-degree corners.
-Brush off excess flour before turning dough and after rolling.
-Make clean cuts. Don’t drag your knife through the puff or twist your cutters too much, which can inhibit rise.
-When egg washing puff pastry, try not to let extra egg wash drip down the cut edges, which can also inhibit rise.
-Extra puff pastry dough freezes beautifully. It’s best to roll it into a sheet about 1/8 to 1/4-inch thick (similar to store-bought puff) and freeze firm on a lined baking sheet. Then you can easily wrap the sheet in plastic, then foil (and if you have a sealable plastic bag big enough, place the wrapped dough inside) and return to the freezer for up to a few months. Defrost in the refrigerator when ready to use.
-You can also freeze well-wrapped, unbaked cut and shaped puff pastry (i.e., unbaked vols-au-vent shells). Bake from frozen, without thawing first.
-Homemade puff pastry is precious stuff, so save any clean scraps. Stack or overlap them, rather than balling them up, to help keep the integrity of the layers. Then give them a singe “turn” and gently re-roll. Scrap puff can be used for applications where a super-high rise is not necessary (such as palmiers, cheese straws, napoleons, or even the bottom bases for your vols-au-vent).

Wednesday, September 23, 2009
Stellar Rice and Beans
 If you read my blog at all you know that beans are a favorite of mine. As I learn to work with them, seasoning them so they are tastier, I like them even more.
There is a restaurant here called Salena's. It happens to be my favorite place to go. Matter of fact, it is a lot of people's favorite place to go. It was voted Best in Rochester many times- for good reason.
I wish I had their recipe for their salsa. I am so addicted to it. Maybe I should contact Gourmet or Bon Apetit and ask them to try and get the recipe for me...
Anyway, these black beans are strikingly close to their black beans (which I also happen to love).
You can make the beans in a crock pot as well. Or you can make them on a Sunday or whatever day you have off and you have them for the rest of the week. They freeze rather well. So, if you are having some Mexican fiesta, you can certainly make them ahead of time. Matter of fact they are always better the next day.
Frijoles de Olla
based on a recipe from, The Border Cookbook, by Cheryl Alters Jamison and Bill Jamison, The Harvard Common Press
2 cups dried black beans
8 cups water or more as needed
1 whole head of garlic, minced
1 dried chipotle
2 teaspoons dried epazote
1 plus teaspoons of salt, depending on your taste
Clean black beans, picking out any debris. Soak overnight. In the morning use the same water and add the garlic, epazote and chipotles. Bring to a boil and reduce to a gentle simmer. Cover and let cook about 2 hours, checking periodically to make sure the water level is good. Add the salt when the beans are tender.
You can add whatever you like afterward. I added some corn, it tasted better as well the next day when the corn had a chance to take on the flavor of the beans.
Friday, September 18, 2009
Moist Bran Muffins
 While it may not be the most exciting of pictures, this little bran muffin packs a powerful flavor punch. Moist and tasty, and in no way related to those cardboard-y type bran muffins.
The extra step of pureeing the raisins may seem a bit tedious but you will be rewarded with amazing bran muffins. I used organic raisins as I heard the average raisin has a ton of pesticides on it.
Bran Muffins
Adapted from Pastries from La Brea Bakery by Nancy Silverton
2 cup wheat bran
1 cup dark raisins
1 cup, plus 1/2 cup water
1/2 cup buttermilk or plain low- or non-fat yogurt
a few swipes of fresh orange zest (unsprayed)
1/2 cup packed light brown sugar
1/2 cup vegetable oil
1 large egg
1 large egg white
1/2 cup flour
1/4 cup whole wheat flour
1 teaspoon baking powder
1 teaspoon baking soda
1/2 teaspoon salt
Preheat the oven to 350F. Line a 12-cup muffin tin with liners.
Spread the wheat bran on a baking sheet and toast in the oven for six to eight minutes, stirring a few times so it cooks evenly. Let cool.
While the bran is toasting, heat 1 cup of the raisins with 1cup of the water. Simmer for ten minutes, or until the water is all absorbed. Puree the raisins in a food processor or blender until smooth.
In a large bowl, mix together the toasted bran, buttermilk or yogurt, and 1 cup water. Mix in the raisin puree, orange zest, and brown sugar. Stir in the oil, egg and egg white. In a seperate bowl mix together the flours, baking powder, baking soda, and salt, and sift directly into the wet ingredients. Stir until the ingredients are just combined.
Spoon the batter into the muffin tins, making sure the batter is mounded slightly in each one. Bake for 25 to 30 minutes, or until the muffins feel set in the center.
Wednesday, September 16, 2009
from scratch Samoa Bars
 Today is my birthday, de ne ne ne ne ne ne neh (the Beatles, just in case you didn't get that). A great happy birthday to me. Today is my youngest daughters first day of preschool. I have two hours all alone for me. I consider that a little gift. Of course my kids, being present in my life, is the biggest gift of all.
I found this recipe on the King Arthur site. Lots of great recipes there.
Sorry Girl Scouts, but I like these a little better than your cookies. Of course I will always love your Thin Mints.
Coconuty from Scratch Samoa Bars
adapted from this recipe
1/2 cup (1 stick, 4 ounces) butter
1 1/2 cups (11 1/4 ounces) brown sugar
2 teaspoons vanilla
1 large egg
1 1/4 cups (5 1/4 ounces) King Arthur Unbleached All-Purpose Flour
1/2 teaspoon salt
1/2 teaspoon baking powder
2 cups (6 ounces) young coconut, toasted
1 cup caramel (recipe follows)
1 1/2 cups (9 ounces) semisweet chocolate chips
1 tablespoon (1/2 ounce) milk or cream
Preheat to 350°F. Butter and line a 9 x 13 inch pan with parchment.
In a large bowl, beat together the butter, sugar, vanilla, and egg. Mix in the flour, salt, baking powder, and 1 1/2 cups of the toasted coconut. Spread the mixture in an ungreased 9" x 13" pan. Bake for 15-20 minutes.
Remove from the oven and drizzle the caramel over the crust and return it to the oven for 10 to 12 minutes; when done it'll be medium-brown and the caramel will be bubbly.
Remove from oven and use a pizza roller or plastic knife to score into bars. Sprinkle the bars with the chocolate. Allow the chocolate to soften for about 5 minutes, then spread it evenly atop the bars. Sprinkle coconut over top of the chocolate. Set aside to cool completely.
Loosen the bars from the edge of the pan and lift them out onto a cutting board. Finish cutting them onto squares.
Caramel
This recipe is based on the one from a reader who rated the King Arthur recipe. It is a very pourable type of caramel.
1 cup sugar
1 T Lyle's golden syrup
3T water
3T butter
1/2 cup heavy cream at least room temp or warmed in micro
2 tsp. vanilla extract
In heavy saucepan bring water, sugar, and syrup to boil. Using a candy thermometer, watch temp, maintaining around 380 until a deep amber color. Do not stir, just swirl the pot. Take off heat and immediately add the cream. This will bubble tremendously. Stir with a wooden spoon constantly until incorporated then stir in the butter and vanilla. The mixture will thicken as it cools.