Tuesday, August 31, 2010

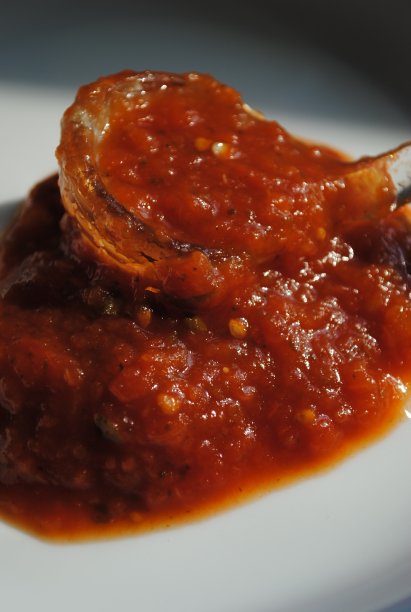
Lori's Fire Roasted Salsa


With love I say this.  For all you people that think your canned salsa is good,  I say it just may be, but this salsa is totally worth checking out.  It totally blows people out of the water.

I should add that the University of Minnesota has some great advice on canning salsa and other things. You can check out their site here.

Lori's Fire Roasted Salsa
The small size recipe in parenthesis, larger size on the right
This is one of those recipes where you have to go by your taste.  I am just giving you a guideline.  The true flavor of this recipe comes from the roasted/smoking.

(10)                   peck of tomatoes, preferably a meaty tomato like romas
(1 or 2)             3 or 4 jalapeños or more (red is better but green works as well)
(1 cup)              6 cups Spanish onions, skins removed
(1/4 cup)           1 bunch of cilantro about 1 cup chopped
(1 teaspoon)     4 tablespoons kosher salt
(2 tablespoons) 1/2 to 1 cup white distilled vinegar
                         mesquite or hickory wood chips
(1)                    10 pablano peppers (you can add or subtract based on heat)
                        1/2 cup oil (to rub on tomatoes prior to roasting)


1. Clean and oil tomatoes, pablanos and jalapeños.
2. Fire up your grill and get your wood chips soaking (they need a good 30 minute soak).
3. Roast the tomatoes, pablano peppers and jalapeños on the grill until they are charred.

4. Remove stem and skin.  Discard with any of the juice that is sitting in the pan from roasting.
5. Combine onion, tomatoes, jalapeños and pablanos in a large kettle.
6. Add white vinegar and kosher salt.
7. Bring to a boil and let boil for about 15 to 25 minutes.  Taste periodically for desired heat, vinegar and salt level.  Feel free to add in more jalapenos if you want a lot of heat.
8. Using an immersion blender or a regular blender, blend the salsa.
9. Add chopped cilantro.
10. Pour into pint jars. Clean rims.  Place lids on and screw on bands.
11. Add into hot water bath and bring pot to a boil.
12. Process canned salsa for 20 minutes.
Yield about 8 pints for a peck of tomatoes.

*I know it is crazy that I do not put garlic into this salsa.  It is so good I really don't want to mess with it.  The pablanos are new this year.  I took a chance.  It worked out good but it really did kick up the heat.

2013 Notes- I added garlic this year.   We yielded 27 pints from 3 pecks of tomatoes.  Two pecks romas, one peck regular.  Two bunches of cilantro. Also added a lot of cumin- like 4 tablespoons. Not quite enough heat from two pablanos so I added 1/4 teaspoon cayenne.  We were going for a mild salsa.

Let me know if you make it and what you think.  Please let me know if you add in garlic or anything else.  Would love to hear about some variations.

Saturday, August 28, 2010

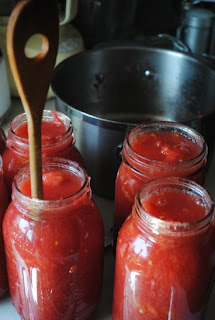
Canning Stewed Tomatoes


A year or so ago I posted about canning tomato sauce.  I used quite a bit of it but still have some left.  The thing I really need in recipes all the time is "stewed" tomatoes.  I was all out in February.  With this year being the stellar year that it is for tomatoes, I took advantage and have been canning those stewed tomatoes. I thought I would pass along some of the tricks.  Hopefully I can remember all of them.  I like putting them on the blog for you but also for me as reference and reminder.  I am usually calling my Mom and asking her about something.  This year I am trying to document as much as possible so I have a permanent reference.

Here are the steps to canning stewed tomatoes:

1.  Wash and sterilize jars.  I use quarts since that is mainly the amount I need for a recipe.

2.  Place a high sided skillet wtih water on to boil.  You want it deep enough to hold the tomatoes without spilling over.  You want it wide enough that you can get quite a few in there to speed up the process.

3.  If your tomatoes are really dirty I recommend washing them so your scalding water doesnt get muddy.  If they are a little dirty don't worry about it.  You are going to be boiling them anyway.

4.  Once the water in the skillet/pan comes to a boil, place some tomatoes in there for about 30 seconds to a minute. Remove them with a slotted spoon to a cookie sheet.  Cookie sheets are great to use because they allow the tomatoes to get air and cool a little so you can handle them.

5.  Take out stem and any hard parts that are at the top of the tomato.  Peel the tomato.  Discard all of the skin and core.  Any bad spots should be removed at this point as well. You may want to quarter them as well.

6.  Place in a large soup pot.  Keep going until you have filled the soup pot.  Once it is filled you should begin the process of putting them in the jars.  Pick up the tomato and hold it over the pot gently squeezing to the seeds come out.  Place the tomato into the jar.  Fill up the jar to nearly the neck.  At this point you put in a teaspoon of salt and a teaspoon of sugar.  These act as a little preservative insurance.  Tomatoes are naturally high in acid so they tend to keep very well.  The sugar and the salt just help out.

7.  You should have quite a bit of juice in the bottom of your soup pot.  Strain the seeds out and pour a little juice into each jar. Now you want to take the handle end of a wooden spoon and place it into the jar.  I poke the tomatoes in the jar towards the outer edge, N-S-E-W (north, south....).  This will help any air pockets to ease out and liquid to fill.  Once you have done that you can place more juice in the jar.  You want to fill with juice, leaving a 1/4 inch of head space.

8.  Wipe the rim clean and place a lid and band on jar.  Place in canner and fill with tap water.  The tap water should be over the tops of the jar by about an inch. Once the water comes to a boil (this takes a little bit of time), you want to process 30 minutes.  Some canning books may say 20 but I go 30.  It doesn't hurt anything and really doesn't hurt the flavor at all either.  They still taste like summer in a jar and are far superior than anything you find at the store.

tips:

If your jars just need a tiny bit more juice and you do not have enough you can use a little water to get it up to that 1/4 inch head space.

If you have leftover juice, it does make a great glass of tomato juice for your breakfast.  Or you can use it for soup.  You can even freeze it if you are sick of tomatoes.
Disclaimer:

The above techniques I learned from my Mother growing up and as an adult.  You should be an informed person when you learn how to can.  You should can at your own comfort level. You can find many resources online.  Here are a few. I have used all of these resources and have found them to be very helpful.

Ball at Home Canning
National Center for Home Food Preservation
Pick Your Own
North Dakota State University
University of Minnesota

*Having said all that, don't be afraid of canning.  Read up on it, take a class, learn from a friend.  Really there is something positively rewarding, eating some local produce in the middle of winter.  Especially out of a jar of food that you canned yourself.

Here is an article about canning that I wrote for Daring Bakers.

Wednesday, August 25, 2010

Dilled Zucchini Soup

I know, you are probably sick of zucchini.  I saw on Serious Eats that the question was, what are you sick of- tomatoes? zucchini? watermelon?  Me, none of it.  I might be sick of canning but I am sure not sick of fresh vegetables or fruit. Variety is the key for me.  We don't have an overabundance of anything from the garden and when we do I either freeze it or can it.  For instance this soup.  It went from the pot tot he freezer because I know I will enjoy it as a quick meal a month or two from now.  I did of course taste it and while it is very simplistic, it is very delicious.  You can of course tweak it to your tastes but something about pureed zucchini and onion makes for one creamy soup.

Dilled Zucchini Soup

2 tablespoons fresh dill or dried dill weed
4 cups zucchini, chopped
1 medium onion, diced (about 3/4 cup to 1 cup)
1 clove garlic
2 cups vegetable or chicken broth
1 tablespoon butter
1 tablespoon olive oil
salt and pepper to taste

Saute onion and zucchini in oil and butter until golden.  Add minced garlic, cook one minute more.  Puree zucchini and onion and add in dill.  Return to pan and add in broth, season with salt and pepper.  Heat until it reaches a gentle simmer.  Cook for about 10 minutes.

*If you like a thinner soup just add more broth.  I tend to eat it like a puree. 

UPDATE 7/7/11:  This freezes really well.  I am so wanting to make it again.  Absolutely loved it.

Monday, August 23, 2010

Curried Red Lentil, Kohlrabi and Cous Cous Salad

You know the summer veggies are drawing to a close when you see zucchini going up in price.  Pretty soon it will be butternut squash, pumpkins, potatoes, beets, celeriac...  I am not complaining one bit.  But I am always sad to see the zucchini go.

When I tell you I have been knee deep in the hoopla that is canning season, sincerely I have been knee deep.  Tomatoes, peaches, jalapenos, jams... If I am home I am canning.  I have not been home much though.  Too many things to do and keeps the kids occupied. Whew!  A busy summer indeed.


Curried Red Lentil, Kohlrabi and Cous Cous Salad
Recipe adapted from this recipe at Epicurious


1/4 cup white wine vinegar
2 teaspoons garam masala
2 garlic cloves, pressed
1/3 cup extra-virgin olive oil
1 cup red lentils
1 large kohlrabi bulb peeled, cut into 1/3-inch dice
1 cup spinach couscous
1/2 cup chopped green onions
1 5-to 6-ounce package baby spinach
1/4 cup chopped fresh mint

Whisk white wine vinegar,  garam masala and pressed garlic in medium bowl to blend. Gradually whisk in olive oil. Season dressing to taste with salt and freshly ground pepper. 

Cook lentils in heavy saucepan of boiling salted water ( about 2 cups) until lentils are barely tender but not too soft, about 4 minutes. Drain; rinse under cold water to cool. Drain again. 

Bring 1 1/4 cups water to boil in same saucepan; remove from heat. Add 3 tablespoons dressing, sprinkle with salt, then stir in couscous. Cover pot and let stand 5 minutes. Transfer couscous to medium bowl. Fluff couscous with fork to separate grains and cool slightly. Season to taste with salt and pepper.

Meanwhile, transfer lentils to large bowl. Add 1/2 cup dressing, diced kohlrabi bulb, and chopped green onions; toss to coat. Season mixture to taste with salt and pepper. 

Arrange baby spinach leaves over large rimmed platter. Drizzle spinach with 2 to 3 tablespoons remaining dressing. Sprinkle spinach leaves with salt and pepper. Mound lentil mixture in center of platter over spinach leaves. Stir mint into couscous. Spoon couscous around lentils and serve with remaining dressing

Saturday, August 21, 2010

Yellow Split Pea Stew


The last four times my husband and I have been out to eat we went to a local Ethiopian restaurant.  Injera, which truly draws me to the place, along with healthy, nutritious, supremely tasty food, is truly an addiction.  There is something so amazing about injera.  I want to make it.  Mostly because I do want to try some other restaurants around town but I simply can not give up this Ethiopian kick.  I bought the teff flour and I have a recipe so I am so close to making it.  Along the way though I thought I'd try some of the dishes I really enjoy, here's one.

Yellow Split Pea Stew or Kik Alicha
Adapted from this recipe.

3 cups water
1 cup dried yellow split peas
2 tablespoons olive oil
1/2 small onion, chopped
1 teaspoon minced jalapeno
2 cloves garlic, minced
1 1 inch-long piece fresh ginger, peeled,
finely chopped 1/2 teaspoon ground turmeric
1 teaspoon salt

Place 3 cups of the water and the peas in large saucepan. Heat over high heat to boiling. Reduce heat to medium; cook until almost tender, about 20 minutes.

Heat olive oil in a medium skillet over medium-high heat; cook onion until translucent, about 5 minutes. Add garlic, ginger, jalapeno and turmeric; cook 1 minute more.

Add a little water if necessary; cover. Cook on low heat 3 minutes. Add mixture to cooked peas; stir in salt. Simmer until peas are very soft, about 30 minutes. Taste; adjust seasonings.

Wednesday, August 18, 2010

Bittersweet Chocolate Chip Bars


Want chocolate chip cookies but dont feel like standing at the oven making cookies?  Want a recipe for chocolate chip "cookies" that you melt the butter rather than waiting for it to get to room temperature?  Want a chocolate chip cookie bar recipe that mixes up in a pinch so you can bring it to a party?  Enter the bittersweet chocolate chip bar!  Wahoo!  Cheers! Celebration!  Chewing! Hmmmm, dah-licious Lori!  Why thank you!

Yup.  It's all good people. Give it a try.

Bittersweet Chocolate Chip Cookie Bars

2 cups plus 2 tablespoons (10 1/2 ounces) unbleached all purpose flour
1/2 teaspoon salt
1/2 teaspoon baking soda
12 tablespoons butter (1 1/2 sticks), melted and cooled slightly
1 cup (7 ounces) light brown sugar
1/2 (3 1/2 ounces) cup granulated sugar
1 large egg
1 large egg yolk
2 teaspoons vanilla extract
2 cups bittersweet chocolate chips (or whatever you like)

Preheat the oven to 325 degrees. Line a 9X13-inch baking pan with foil, letting the excess hang over the edges of the pan by about 1 inch so you can grab the edges and pull the bars from the pan after they have baked. Spray the foil-lined pan with nonstick cooking spray.

Mix the flour, salt, and baking soda together in medium bowl; set aside. Whisk the melted butter and sugars in a large bowl until combined. Add the egg, egg yolk, and vanilla and mix well. Using a rubber spatula, fold the dry ingredients into the egg mixture until just combined; do not overmix. Fold in the chocolate chips and turn the batter into the prepared pan, smoothing the top with the spatula.

Bake until the top of the bars is light golden brown, slightly firm to the touch, and edges start pulling away from sides of pan, 24-28 minutes. Cool to room temperature. Remove the bars from the pan by lifting the foil overhang and transfer them to a cutting board. Cut into 2-inch squares and serve.


Monday, August 16, 2010

Hot Dilly Beans


Do you have a lot of green beans?  Have I got the recipe for you.  My friends Mom use to can these all the time.  I remember chomping on them at her house when we were in high school.  I made some myself a couple years ago and we just finished the last of them this past winter.  With my husband able to withstand a little spicy heat in his food, I decided they were totally worth canning up.

For canning, this is a pretty easy recipe. I think the hardest part is cleaning the beans and stuffing the jars.  Once that is out of the way the rest is easy peasy.  If you have wide mouthed jars it is much easier to can these.  You can use regular pint jars but it will be more difficult stuffing them.

Hot Dilly Beans
You don't have to make these spicy by the way if you can not stand the heat.

2 pounds of beans
1 teaspoon cayenne pepper
2 cloves garlic, whole and peeled

6 heads of dill (or 1/2 tsp. dill weed)
5 cups distilled vinegar
1/2 cup pickling or kosher salt
5 cups water

Prepare jars for canning. Wash and trim beans at ends. Do not snap beans.

Bring vinegar, salt and water to a boil.

In the bottom each hot sterilized jar, put the garlic cloves, and dill.

Pack jars with fresh green beans, packed lengthwise.

Again, do not snap beans.

Process for 20 minutes at 1000' altitude, or adjust time according to your altitude.

6 Pints. (You will have enough brine to probably do a couple more pints.  Having some extra beans around just in case is not a bad idea.) You can store the brine and reheat and use it to pickle something else as well.

Saturday, August 14, 2010

Daring Cooks: Pierogi


I am not new to pierogi.  Since my Mother is Polish, we have been celebrating the traditional Polish meal at Christmas time which you can read about here.  We rarely have it at other times of the year.  Why?  I don't know because they are pretty darn good.  The dough is so similar to a Chinese dumpling but of the filling is obviously totally different.

I ran out of time this challenge.  These are the blueberry pierogi that I have always wanted to try. Eh.  They were okay. All you do is put about five blueberries or so in the pierogi.  I prefer the potatoes or sauer kraut ones.  Tomorrow I will be doing the potato filled ones.

The August 2010 Daring Cooks’ Challenge was hosted by LizG of Bits n’ Bites and Anula of Anula’s Kitchen. They chose to challenge Daring Cooks to make pierogi from scratch and an optional challenge to provide one filling that best represents their locale.

Today is the day to visit other Daring Cooks and see what their interpretations were for these pierogi wonders! I am sure you will find many interesting and delicious combinations. Click here for the blog roll.

Russian style pierogi (makes 4 generous servings, around 30 dumplings)
The recipe for the filling is my interpretation.


Dough:
2 to 2 1/2 cups (300 to 375 g) all-purpose (plain) flour
1 large egg
1 teaspoon (5 ml) salt
About 1 cup (250 ml) lukewarm water
Filling:
3 big potatoes, cooked & mashed (1 1/2 cup instant or leftover mashed potatoes is fine too)   
1 cup (225 g) cottage cheese, drained       
1 egg yolk (from medium egg)
1 tablespoon (15 g) butter, melted       
1/4 (1.25 ml) teaspoon salt       
pinch of pepper to taste    
1. Combine all the ingredients for the filling (it’s best to use one’s hands to do that) put into the bowl, cover and set aside in the fridge until you have to use it.
2. Place 2 cups flour in a large bowl or on a work surface and make a well in the center. Break the egg into it, add the salt and a little lukewarm at a time (in my situation 1/2 cup was enough). Bring the dough together, kneading well and adding more flour or water as necessary. Cover the dough with a bowl or towel. You’re aiming for soft dough. Let it rest 20 minutes.
3. On a floured work surface, roll the dough out thinly (1/8” or about 3 millimeters) cut with a 2-inch (5 cm) round or glass (personally I used 4-inch/10 cm cutter as it makes nice size pierogi - this way I got around 30 of them and 1 full, heaped teaspoon of filling is perfect for that size). Spoon a portion (teaspoon will be the best) of the filling into the middle of each circle. Fold dough in half and pinch edges together. Gather scraps, re-roll and fill. Repeat with remaining dough.
4. Bring a large, low saucepan of salted water to boil. Drop in the pierogi, not too many, only single layer in the pan! Return to the boil and reduce heat. When the pierogi rise to the surface, continue to simmer a few minutes more ( usually about 5 minutes). Remove one dumpling with a slotted spoon and taste if ready. When satisfied, remove remaining pierogi from the water.
 5. Serve immediately preferably with creme fraiche or fry. Cold pierogi can be fried.  Boiled Russian pierogi can be easily frozen and boiled taken out straight from the freezer.
*When preparing large batches of pierogi we heat the oven to the lowest setting and pile the pierogi in a large casserole pan.  Layering butter and fried onions in betweent eh layers.

I thought it was the perfect time to tell you about the Polish Festival that we went to last weekend.  It has become a tradition.  We always go with some friends of ours and the kids run wild!  Games are cheap, 25 cents for the most part.  So it is a pretty inexpensive evening but a lot of fun. 

Thursday, August 12, 2010

Chop Chop Salad with Lime Basil Vinaigrette


I love the idea of a chop-chop salad. I love to say chop-chop. Why? 'Cause I am silly like that. I really am a salad girl. I love it. Once in a while though I crave a medley of veggies minus the lettuce, especially when all of these fresh vegetable are in season. Enter my chop-chop salad. We (I really mean I because my husband never broke away from his work to do the grill) added some grilled flank steak and if you really want to round out this meal you could add a loaf of crusty bread. A nice, fresh, summer time meal. (My honey has been working WAY too much). 

Have I ever told you how much I enjoy dicing vegetables?  Maybe my true calling is to a be a sous chef.  I have always found it to be very relaxing.  Does anyone else have an affinity to chop chop?

Chop-Chop Salad with Lime Basil Vinaigrette
my ode to summer produce creation

4 cups zucchini diced
2 cups fresh corn off the cob (off of about 4 cobs)
6 radishes, diced
4 green onions, sliced
1 small red onion (about a 1/2 cup), fine diced
1 cup kohlrabi
1 roasted red pepper, chopped
1 avocado, diced
6-8 roma tomatoes, diced
10 leaves of basil, chiffonade

dressing:

3/4 cup of olive oil
1 teaspoon kosher salt
1 tablespoon sugar
juice of three or four limes
fresh cracked pepper
1 tablespoon dijon mustard

Combine all the chopped vegetables in a large bowl.  In a small bowl or a large measuring cup whisk together lime juice, dijon, sugar, salt and pepper.  Slowly drizzle in olive oil while whisking away.  You will have quite a bit of dressing.  You can use any portion left over for salads or even some bean salads.  Or you can just reduce the amounts given for a smaller quantity. It will keep for a couple weeks in the fridge.

Wednesday, August 11, 2010

Blueberry Cheesecake Squares


Blueberries are one of the highlights of summer for me.  We make an all day occassion of it.  You can read more about it here.  It has become a summer tradition.  The blueberry farm where we pick is an hour away from here.  Yes, we have some closer but there is something amazing about acres and acres of blueberry bushes that are taller than me! Besides we know the guy that runs the place and I look forward to seeing him and his dog every year.  I like listening to the Mexicans listening to their music and swearing in Spanish as I pick my blueberries.  It puts a smile on my face.  I love watching my kids run up and down the massive rows and eating blueberries till their little bellies paunch.  "Ah, ma, I just can't pick anymore!" Um, you mean you just can't eat anymore.  But really they did pretty good this year.  They filled up their little buckets twice with keepable blueberries!  That's progress.

Picking blueberries also gives my children some perspective on where their food comes from.  When we sit down at a meal they know that someone picked that food.  Made close to peanuts picking it but did so anyways for the sake of their families.  It was then brought to the warehouse, then to the store by truckers or workers who also had families to feed.  We bought it, brought it home and cooked it lovingly.  I hope that they can appreciate every effort that went into bringing that food to their plate.  I stop and think about it when I am, say, enjoying a mango from Mexico.  All the hands that brought it to my table.  And sometimes when I have a sense of peace and place I say a prayer for every soul that touched my food to make it possible for me to have it.  I know. It may sound a little sappy but I want to recognize the effort and hard work. I want other people to do the same.  Appreciation and gratitude is always the best thing.

Now here is a little love and appreciation for the people who showed me this WAY delicious recipe... Giz and company over at Equal Opportunity Kitchen.

Blueberry Cheesecake Bars
adapted from this recipe

1 1/2 cups vanilla wafer crumbs
1/2 stick melted butter - (4 Tbsp)
12 oz of cream cheese
5 tablespoon sugar
1/4 cup milk
2 tablespoon cornstarch
2 tablespoon lemon juice
1 teaspoons lemon zest
3 eggs
1 1/2 cups blueberries

Preheat oven to 350 F. Line an 8x8 square baking pan with aluminum foil. Mix vanilla wafer crumbs with melted butter and press firmly into the bottom of the pan.

In a large bowl, blend cream cheese, eggs, milk, sugar, cornstarch, lemon juice and zest until smooth. (don't overmix or you'll get cracks)

Pour the mixture into the crust and cover the top with blueberries. Bake in the oven for 30-40 min or until the center is still a little jiggly but about to set.

Cool completely. Lift the cheesecake out of the pan and cut into bars.

Monday, August 9, 2010

Apricot and Zucchini Muffins

I can add these to my zucchini collection.  This is a VERY good recipe that is very delicious.  A definite make again when I have marmalade.  That is what the original recipe calls for but I had a teensy bit of apricot jam to use up.  I think I should have put bits of dried apricots instead of raisins but I thought of that too late... next time.


Zucchini and Apricot Jam Muffins
adapted from this recipe at William Sonoma

1 1/2 cups unbleached all-purpose flour
3/4  cup sugar
2 tsp. baking powder
1/4 tsp. baking soda
1/4 tsp. salt
1/2 tsp. ground cinnamon
2 eggs
1/3 cup canola oil
1/4 cup apricot jam
1 tsp. vanilla extract
1 zucchini, shredded and squeezed in a colander to equal 1 1/2 cups.
3/4 cup dark raisins or dried sweet cherries


Directions:
Preheat an oven to 400°F. Grease 10 standard muffin cups with butter or butter-flavored nonstick cooking spray.

In a large bowl, combine the dry ingredients: the flour, sugar, baking powder, baking soda, salt and cinnamon.

In another bowl, whisk together the eggs, oil, jam, vanilla and zucchini until blended. Add the flour mixture and beat just until evenly moistened and smooth. Stir in the raisins. The batter will be fairly thick.

Spoon the batter into the muffin cups, filling each no more than three-fourths full. Bake until the muffins are golden, dry and springy to the touch, and a toothpick inserted into the center comes out clean, 17 to 20 minutes. Transfer the pan to a wire rack and let cool for 10 minutes. Unmold the muffins. Serve them warm or at room temperature, with butter. Makes 12 muffins.
Update: I made these again with apricot bits and quince jam- delicious. I also reduced the sugar to a 1/2 cup. Do not overbake these by the way you will have seriously dry muffins.

Sunday, August 8, 2010

Moist For Days Cornbread


I think I probably have made some corn bread on this blog before and you might be thinking why make another.  The reason why is that this particular version of cornbread should be called, "Moist for Days Cornbread" (not that it would necessarily last that long). The name really says it all.

We enjoyed this cornbread with pulled pork that I bought from the Dinosaur Barbeque, along with some cole slaw, corn on the cob and baked beans (what a feast).  A delicious Southern style meal that just can't be beat.  Sure to please.

Moist for Days Cornbread
Recipe adapted from one of those handy little recipe books that are usually found by the cash registers.  This one is called, The Work Basket, February 1982.

1 can creamstyle corn
1 cup or 8 ounces sour cream
1 cup self rising cornmeal
1/2 cup corn oil
2 eggs

Mix all ingredients thoroughly.  Pour into hot greased skillet,  Bake for 45 minutes at 400F.

Thursday, August 5, 2010

Calabacitas


One of the best things of this summer was a few activities we did at Barnes and Noble. I am not promoting here, I am just saying this is one of the best activities of summer that was free! The first activity was a reading of some Fancy Nancy Books, followed by a Fancy, Nancy Spa door hanger craft. The kids were served a mini vanilla frappacino with a pirouette cookie. The second activity was a reading of the Very Hungry Caterpillar followed by an ice cream cone! For free! How nice is that? The ladies that head it up are real sweet. The girls really enjoy every aspect of this activity.  Take the time to search for freebies, they are certainly worth it.

With super hot temperatures continuing I would have to say that I have not been doing a lot of baking and cooking. Here was one recipe that was totally worth the time and effort (and sweat). Calabacitas!

Creamy, delicious, nutritious... these totally bordered on decadent. Seriously! I really am a vegetable fan to say something like that but I think even if you are not a big fan of vegetables you will like this dish.

Calabacitas
original recipe here.

3 ears fresh corn on the cob, corn cut away from cob
1 small piece of a fresh poblano chiles
1 large white onion, thinly sliced
1 tablespoon butter
1/2 pound zucchini, cut into 1-inch wedges
6 garlic cloves, minced
1 teaspoon dried epazote
1/2 cup sour cream
1/4 cup queso fresco, crumbled
Salt and black pepper
Fresh corn tortillas

Roast pablano chili over flame.  You can use a gas burner on your stove top or you can roast them on the grill.  Not a bad idea to roast a bunch and freeze in small portions.


Reserve some of the water from cooking the corn or you can boil the cobs in water to get the broth used for this recipe.

Saute the onion in butter until transluscent.  Add the chopped zucchini, epazote, garlic, corn and chilies.  Saute until lightly golden.  Add the water and the sour cream, continue cooking for about five minutes. Season with salt and pepper to taste.

Sprinkle with queso fresco and serve with corn tortillas.

Monday, August 2, 2010

Tropical Cake


At first I was going to name this cake "mistake cake".  It was a lesson in structure.  In the end, though, the taste did an over ride and said, we can not name this mistake cake.  Maybe Leaning Tower of Pisa cake but definitely not a mistake.

I saw Bo Friburg's recipe for chiffon cake and thought it would make a nice light feeling to go with the mousse. A coconut white chocolate ganache on top with a sprinkling of candied pineapple. It all seemed good in my head.

If I had cut it into squares rather than bar like pieces I think it would have fared a bit better.

Really and truly this cake is worth making.  If you want a sturdier structure go with a jaconde or a dacquoise. If you want light cake with seemingly light mousse, go with this recipe. Just cut it into squares instead.

Passion Fruit Mousse

1 package Goya passion fruit pulp or approximately 2 cups of pulp
1 can evaporated milk
2 tablespoons sugar
1 1/2 tablespoons gelatin
1/4 cup cold water
2 cups heavy cream

Combine passionfruit and evaporated milk in a large mixing bowl.  In a small microwave safe bowl combine water and gelatin and let sit until the gelatin is absorbed.  Heat in microwave for about 35 seconds until gelatin is melted.  Pour into passionfruit mixture, making sure that it is fully incorporated. Refrigerate.

In a medium sized bowl whip heavy cream until frothy, adding sugar slowly.  Continue to whip until peaks form. Gently fold whipped cream into passionfruit mixture.  Let mixture chill until it is fully set. Preferably overnight.

White Chiffon Cake
adapted from Bo Friberg's book, The Advanced Professional Pastry Chef

2/3 cup vegetable oil
8 egg yolks
1 cup water at room temp
1 tablespoon vanilla extract
14 ounces cake flour
14 ounces sugar
4 teaspoons baking powder
1 teaspoon salt
8 egg whites

Line a two jelly roll pans  with parchment, grease the paper but not the sides of the pan.

In a large bowl whisk the vegetable oil and egg yolks together just until combined.  Add the water and the vanilla extract.

In a small bowl combine flour, one third of the sugar, baking powder and salt.  Stir this into the egg yolk mixture, whip at high speed one minute.  Set aside.

Whip egg whites until foamy and add the remainder of the sugar slowly as you continue to whip until stiff peaks form.  Divide batter between pans and smooth out top.

Bake at 375 F for 25 minutes or until cake springs back when lightly touched. Allow cakes to cool before removing from their pans.


White Chocolate Coconut Glaze

14 ounces white chocolate, chopped
1 cup heavy cream
2 tablespoon coconut oil

In a double boiler combine white chocolate, coconut oil and cream, stirring until all the white chocolate has dissolved.  Let cool slightly and pour over cake with a spoon to diffuse the liquid as it hits the cake.

*Sprinkle with chopped candied pineapple.