Wednesday, July 2, 2014

Canning The Harvest, Part II Jams and Jellies


JAMS AND JELLIES

Apricot Jalapeno Jam


Apricot Jam


Blueberry Vanilla Jam


Currant Jam


Orange Marmalade


Peach Amaretto Jam


Pineapple Preserves


Strawberry Freezer Jam
 

Strawberry Margarita Preserves
Peach Amaretto Jam
My personal favorite.  Since I make it as gifts for a few people that have tried it- I'd have to say it is a real winner.

So there you have it- my canning collection in two parts.  This has made me realize how many of my canned goods I haven't posted.  Stay tuned I am sure they will be forth coming with a new round of the harvest this year.

Sunday, June 29, 2014

Canning The Harvest, Part I


Before the major portion of canning and harvesting is under way, I wanted to put together a collection of canned goods that I have done (most of them I do every year).

When I started composing this post I realized just how many canned goods I had done over the years that I have had this blog... five, six years... I lost count. I decided to break it up into two parts because jams and jellies are plentiful.  I was really on a kick with them for a few years.

If you have never canned before-  don't be afraid.  Do your research.  On a few of my posts I describe the different types of canning and high acid foods and low acid foods with links to other sources.  You can find info on my site here and here. There are a plethora (love to have an excuse to say that word) of sites on the Internet with all kinds of information.  Follow the directions and you will be fine.  One of my favorite sites to go to is Ball Canning.  I have a couple of their books and they could not be more helpful.  

Apples

Apple Butter


Strapple Sauce

Beans

Hot Dilly Beans


Cherries

Marachino Cherries


Cucumbers

Bread and Butter Pickles

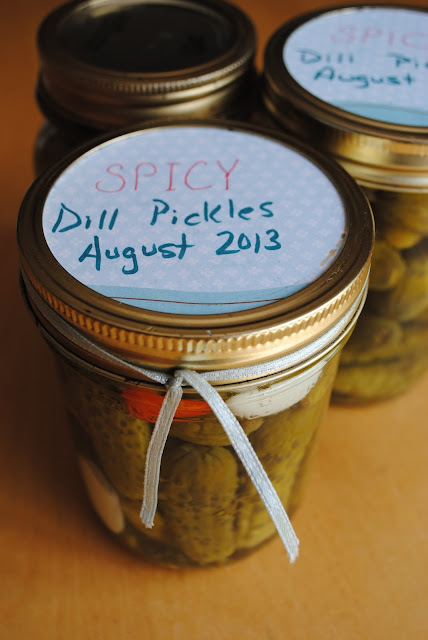
Dill Pickles
 http://lipsmackinggoodness.blogspot.com/2013/08/dill-pickles.html

Dill Relish


Eggplant

Melanzan Salad


Plums

Whole Plums


Tomatoes

Bruschetta in a Jar
 

Canned Ketchup

Stewed Tomatoes
 
Green Tomatoes

 
Fire Roasted Salsa


Spiced Green Tomato Jam I and II

Tomato Sauce


Tomato Soup


Green Tomato Chutney


t

Thursday, June 26, 2014

Chocolate Peanut Butter Crunch Bars


Swirly Twirly Delicious Crunch Bars.  Don't they look all cream and coffee like?  They have nothing to do with coffee.  They have everything to do with peanut butter, chocolate and rice crispy-ish cereal.

My kids went crazy over these even my daughter who is not necessarily a fan of peanut butter.  I will tell you they are pretty rich.  To be true I would like them just as well without the topping.  Just the crunch part.  Next time I make them I will just drizzle a little chocolate over top or stir it into the mix. (This may be one of those times when I am being like my Mom- scraping frosting off of cake- yes, she is one of those).
Chocolate Peanut Butter Crunch Bars
Super crispy.

3 cups crispy rice cereal
3/4 cup brown sugar
1 cup peanut butter
1/2 cup corn syrup
1 tablespoon vanilla extract

1 1/2 cups semi sweet chocolate chips
2 tablespoons shortening
1 1/2 cups peanut butter chips

Lay parchment or foil in a 8 x 8 square pan. Set aside.


In a microwave safe bowl or on the stove combine corn syrup, sugar and peanut butter.  Heat for one minute, stir.  Heat one minute more.  Combine this mixture with the vanilla and then the rice cereal. Press into prepared pan, smoothing the top.  Chill for at least an hour.

Melt chocolate chips with shortening, stirring frequently.  Once melted spread over top of rice cereal mixture.  Next, melt peanut butter chips, stirring frequently as well.  Once melted place blops, a very technical term, of peanut butter in various places on melted chocolate.  Take a toothpick or a skewer and swirl the peanut butter blops into the chocolate.  Chill.  Best if you chill overnight.  Its really difficult to wait that long.

Monday, June 23, 2014

Cinnamon Scones


I just recently had a garage sale here at the house.  I have had garage sales in the past.  They are exhausting.  I had some company so that helped quite a bit.  If it wasn't for her I don't think I would have opened the sale on day 2.  My head hit the pillow after it was all over the first day and I was out like a light. Switch to off.  Boom. Out cold.

I got rid of a lot of stuff. A lot of stuff!  But so much more to get rid of.  Donation.

Will I do it again?  eh.  Probably not.

I love going to garage sales.  Apparently, I have liked it a little too much as indicated by the pile of stuff I had to sell.  So, from now on, only what I need.
 
Cinnamon Scones

2 cups flour, unbleached
2 teaspoons baking powder
1/2 teaspoon baking soda
1/2 teaspoon salt
1/2 cup butter
1 egg yolk
1/3 cup sugar
1/2 teaspoon cinnamon
1 cup thick buttermilk or heavy cream

Glaze
1/2 cup sugar, blended fine in a blender
1 tablespoon half and half

cinnamon sugar for sprinkling

Preheat oven to 400 degrees. Use a scone pan.  If you don't have a scone pan, some parchment on a cookie sheet will work very nicely.

Combine flour, cinnamon, baking powder, baking soda and salt. Cut in butter with a pastry blender or your fingers until mixture is crumbly and resembles coarse meal.


In a separate bowl, mix egg yolk, sugar and buttermilk. Add to the dry ingredients and stir until just combined.

If you are using parchment: form dough into a ball and roll on a floured surface. Roll or pat out to half an inch in thickness and eight inches in diameter. Cut into eight equally-sized pieces. Move shapes onto parchment.

If you are using a scone pan: (yes, I have one and I love it):  Spoon mixture equally into the triangular compartments.

Place parchment on baking sheet.  Bake at 400 degrees for 25 to 30 minutes.
In a blender place sugar and grind for a few moments.  Add in the milk.  Drizzle over scones while they are fresh out of the oven.  Sprinkle with cinnamon sugar.

Saturday, June 21, 2014

Banana Matcha Milkshake


Note how the straw stands on its own.
This is delish.  My kids were a bit skeptical about that green stuff I was throwing in there.  Goodness gracious, not the dreaded green stuff!  But then I told them it is like their beloved Green Tea Mints from Trader Joes and then all was right with the world again.

The smoothies, milkshakes, whatever you want to call them, were gone in like 30 seconds flat.  Okay, honestly... five minutes max.  Mine was the one finished in 30 seconds, ahem.

The idea for this smoothie came from this site called, Kleinworth and Company.  I changed it up a bit because it way too thick- thick, as in I would never get it smooth because of my blender.
 

Banana Matcha Milkshake


2 1/2 cups of 2% milk
3 frozen bananas
2 teaspoons Matcha
3/4 cup chopped pineapple

Slice 3 bananas and freeze them at least 30 minutes.

Blend all ingredients together.  If you are like me and have a 25 dollar blender, you will have to keep sticking the handle of a wooden spoon down in there and mix it around from time to time (of course, with the motor stopped).  This is one thick shake. Don't be annoyed by this, it is totally worth it. 

Thursday, June 19, 2014

Cheese Arepas


No time for styling, just snapped a pic to show you arepas. You can make these fairly quickly. I need to work on shaping them better.  This is the second time I made them.  I plan on making some this summer to go with some fresh veggies- tomatoes specifically.  Hmmmm tomatoes.

Cheese Arepas

2 1/2 cups warm water
2 tablespoons butter, melted
1 tablespoon sugar
2 cups arepa flour
4 ounces queso blanco or feta
4 ounces Parmigiano Reggiano

Mix all together and let sit for five minutes.  Knead together and form into patties to fry.

Heat a skillet. Add a little oil on top and fry the arepa until it is lightly golden.  Flip and brown.  Serve with beans, pork, beef or chicken.


Check out this lovely lady on you Tube showing how to make arepas- I need to try her recipe! There are a ton of videos on arepas.


I just learned about Hello Arepa here in Rochester.  Apparently, they are at the Pittsford Farmers Market on Thursday nights and different places for lunch.  You can check out their Facebook page here.  I must go check these out.
Photo: The weather's perfect and the window's up! 1000 University until 2. #eatarepas #allthecoolkidsdo #truestory
source: Hello Arepa @ their FB page

Tuesday, June 17, 2014

Strawberry Buttermilk Ice Cream


I am so loving all of these strawberries that Driscoll has bestowed upon me.  Thank you so much!  I made some strawberry ice cream over the weekend as well.  I love this ice cream because it is lighter and the taste of the strawberries shines through like nobody's business.

Aren't they just super beautiful?  I think so.

Buttermilk Strawberry Ice Cream

2 cups strawberries, washed and stemmed
2 cups buttermilk
1 cup sugar
1 teaspoon vanilla extract

In a food processor, process strawberries just barely- liquid-y but chopped into smallish chunks. Pour into a bowl and stir in buttermilk, sugar and vanilla. Chill overnight or at the very least a couple hours.

Following the manufacturers directions, process through ice cream maker.