

So here is the second installment of green tomato jam experiments. I LOVE this jam! It has the viscosity of a really thick corn syrup or molasses in January. It has amazing flavor, different then the other one and well worth making. My husband was eating it by the spoon fulls. The inspiration for the recipe came from a book called, Mes Confitures by Ferber. Thank you Tartelette for the recommendation.
There is a different process for making this jam. It's not the usual American way for making jam. I hear by warn you that if you are not comfortable with experimenting with different jam processes than try this with the canning processes set forth by Ball or any source that you do feel comfortable with.
I am so JAM happy, I tell you! It's a winner and it will soon be dressed up for the Holidays in gift baskets with homemade crackers.
SPICED GREEN TOMATO JAM
Lori's Lipsmacking Goodness
1 1/2 pounds of green tomatoes that are chopped and seeded
2 3/4 cup granulated sugar
juice of one lemon
1 cinnamon stick
1/2 teaspoon all spice
2 inch piece of ginger, minced
Start with about two pounds or more of green tomatoes. Slice them and remove as many of the seeds as possible. Chop and set aside until you have about 1 1/2 pounds. Mince a two inch piece of ginger. Combine with green tomatoes in glass bowl. Add to this 2 3/4 cup sugar and juice of a lemon. Stir well. Cover bowl with parchment paper or a cutting board and leave overnight.
The next day, pour the mixture into a heavy bottomed sauce pan with the cinnamon stick and 1/2 teaspoon allspice. Bring to a boil and simmer lightly for about ten minutes. Pour the mixture back in a clean glass bowl. Refrigerate overnight. I let it sit out on the counter as it was cool enough.
The next day, bring mixture to a boil again. Boil for about fifteen minutes and place in canning jars (half pints). Clean rims, place lids on and screw bands on. Turn them upside down for fifteen minutes. Place them right side up, cover with towel and allow to sit for at least 12 hours to make sure they seal. Yield 4 half pints or 32 ounces.
*Note: you can strain the mixture to get the skins out but I like the little chewy pieces. Please refer to Ferber's book for details.
Saturday, September 13, 2008
GREEN TOMATO JAM, Part II
Monday, September 8, 2008
GREEN TOMATO JAM with vanilla and ginger
 This stuff is so good. This has been the year for canning jams and such. I don't usually can so much jam but I am thinking with all the DB challenges and cool stuff out in the blogger world I will have a need for it.
 This is not a recipe that I would normally do as the combination of flavors is not something I would pick. However I am so glad that I ventured out of my comfort zone and tried this awesome recipe. I found it at Rosa Jacksons blog, Edible Adventures Paris.Nice and Beyond.
I will love this during the Holidays with mascarpone on a cracker. I could also see it as a glaze for a roast. Tomorrow I am making another green tomato jam. Tune in to see this yummy flavor combination.
Green tomato jam with ginger and vanilla
original found here Edible Adventures
Makes about 4 11-oz (300 g) jars
4 1/2 lbs green tomatoes (2 kg)
1/2 the weight in sugar of the tomatoes, once the tomatoes have been deseeded and diced
2-inch chunk ginger, peeled (5 cm)
1 vanilla bean
Juice of 1 lemon
Chop the tomatoes and squeeze out as much of the seeds as you can. After chopping weith the tomatoes. Half the weight of the tomatoes should be the weight of your sugar. Slice the ginger against the grain and then chop it finely. Slit the vanilla bean in half and scrape out the seeds with a knife, holding each half flat against the board as you scrape.
Place the tomatoes, sugar, ginger, vanilla bean with its seeds and lemon juice in a large saucepan. Bring to a boil, stirring, then reduce the heat and let the jam simmer and reduce until thickened. It should look like a thick, syrupy green tomato sauce, which can take up to 2 hours. To test for doneness, drip some of the liquid onto a cold plate. If it sets, the jam is done.
Meanwhile sterilize the jars, either by boiling them in a large pot of water for 10 minutes or washing them well and placing them in the oven at 375 F (180 C) to dry for 20 mins. Fill the pots with the jam while both are still very hot. Seal with very clean lids. Turn jars upside down for fifteen minutes. Then turn upright. When jars have "pinged" they are done. If a jar lid does not sink down wait 24 hours to see if it goes down. If not place in the refrigerator.
Friday, August 28, 2009
Cheddar Crackers with Tomato Jam
 I recently participated in a jam exchange at Steph Chows. She stopped by my site and asked me to join in the fun. I never realized that she lives here in Rochester. Whoa- that is totally cool. Now, I think I should organize Rochester, Syracuse and Buffalo bloggers for a get together.
 My package arrived with two little jars of jelly inside. Two tastey morsels of amazing, melt in your mouth, delicious, perfectly flavored tomato jam. I had to think of something special to do with the jam. The jam is from Natalie of Natalie's Killer Cuisine. (go check out her jam, it is AMAZING).
After returning from our trip and quick look at the fridge's contents told me I needed to do something real fast with the sharp cheddar that I had in there. I had two packs from a recent trip to an Amish store in Penn Yan. The one had an end that was starting to mold. I shaved off that end and shredded all of it up to make some amazing cheddar crackers. The crackers are amazing but paired with this jam, it is a combination that takes taste over the top. After I had the jam with it, the plain crackers just did not taste as good.
In the words of Andy Griffith, "Good cracker."
Aged Cheddar Crackers
inspired from this recipe at Epicurious
1 stick (1/2 cup) unsalted butter, softened
3/4 lb sharp Cheddar, coarsely grated (preferably in a food processor)
1 large egg yolk
1 cup all-purpose flour
1 teaspoon dried mustard
3/4 teaspoon salt
1 teaspoon cracked black pepper
1 teaspoon nigella seeds
Blend together butter, cheese, and yolk in food processor until smooth. Add flour, dried mustard, and salt and pulse until just combined. Add pepper and nigella seeds, and pulse until combined well, then transfer to a sheet of wax paper. Shape into a log (1 1/2 - 2 inches thick), using paper as an aid, then roll up log in paper and twist ends of paper to close. Chill log until firm, about 2 hours.
Put oven rack in middle position and preheat oven to 350°F. Line a large baking sheet with parchment paper.
Unwrap log and cut enough thin slices (about 1/8 inch thick) from it to fill baking sheet, arranging slices 1 inch apart. Return log to fridge. Bake until edges of crackers are golden, 10 to 12 minutes. Transfer on parchment to a rack and cool slightly, about 15 minutes. Make more crackers in batches with remaining dough.
Serve crackers warm or at room temperature.
Cooks' notes: Dough can be chilled, wrapped additionally in foil or in a sealed plastic bag, 1 week or frozen 2 months. Crackers can be baked 1 week ahead and cooled completely, uncovered, then kept in an airtight container at room temperature. If desired, reheat on 2 baking sheets in a preheated 350°F oven about 5 minutes.

Friday, October 9, 2009
Got Green Tomatoes?
 If you are a gardener that has tomatoes, the inevitable happens every year. The end of growing season comes before all of your tomatoes are finished growing.
Here are a few things I have done with green tomatoes in the past.
Green Tomato Jam I and II (no jello in these)

Green Tomato Salad (that you can also can)
And now Green Tomato Chutney. The nice thing about this one is that you can can it as well. I found the recipe in Martha Stewart Annual 2003.
Green Tomato Chutney
4 pounds green tomatoes, finely diced
2 cinnamon sticks
1 tablespoon mustard seeds
1/2 cup cider vinegar
1/4 teaspoon cayenne
1 large onion, diced
1 cup golden raisins
2 cups packed brown sugar
finely grated zest of one lemon
Bring all of the ingredients to a boil in a large saucepan. Reduce heat to medium-high and simmer until mixture thickens. This will take over an hour, depending on how high your heat is.
Remove cinnamon sticks and place in 1/2 pint jars, wiping any spillage at the top of the jar. Place lids and rims on and seal. Place in a hot water bath (water should cover jars) and boil for 15 minutes. Remove jars from water bath and place on towel. Jars should seal within an hour. If there are any jars that the lids did not "go down" or seal, after they have cooled, refrigerate them.
Sunday, June 29, 2014
Canning The Harvest, Part I

Before the major portion of canning and harvesting is under way, I wanted to put together a collection of canned goods that I have done (most of them I do every year).
When I started composing this post I realized just how many canned goods I had done over the years that I have had this blog... five, six years... I lost count. I decided to break it up into two parts because jams and jellies are plentiful. I was really on a kick with them for a few years.
If you have never canned before- don't be afraid. Do your research. On a few of my posts I describe the different types of canning and high acid foods and low acid foods with links to other sources. You can find info on my site here and here. There are a plethora (love to have an excuse to say that word) of sites on the Internet with all kinds of information. Follow the directions and you will be fine. One of my favorite sites to go to is Ball Canning. I have a couple of their books and they could not be more helpful.
Apples
Apple Butter

Strapple Sauce
 Beans
BeansHot Dilly Beans

Cherries
Marachino Cherries

Cucumbers
Bread and Butter Pickles

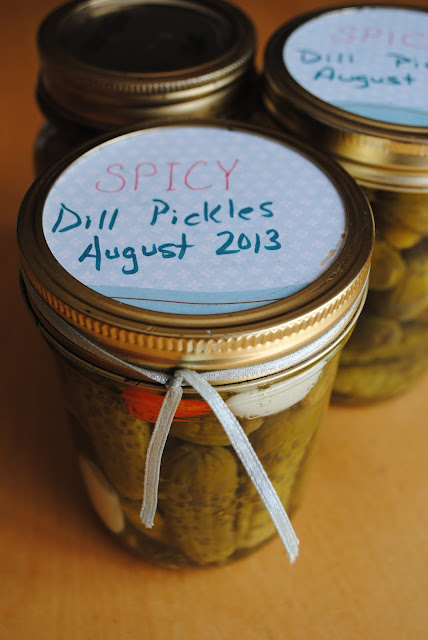
Dill Pickles
Dill Relish

Eggplant
Melanzan Salad

Plums
Whole Plums

Tomatoes
Bruschetta in a Jar

Canned Ketchup
Stewed Tomatoes

Green Tomatoes

Fire Roasted Salsa

Spiced Green Tomato Jam I and II

Tomato Sauce

Tomato Soup

Green Tomato Chutney

t
Saturday, October 20, 2012
Green Tomatoes and Salsa Verde

I have made fried green tomatoes before, at least once per summer.
But now I have a new favorite with about six containers in my freezer to prove it. Salsa verde. Now, before you go getting your panties in a ruffle, I know salsa verde is traditionally made with tomatillos. And yes, I make that and I love it. But why not green tomatoes? They are green and I turned them into sauce- thus salsa verde.


Salsa Verde, Green Tomato style
This recipe will make enough salsa that you can freeze about 3 cups of it and have some for this dish as well. If you do not want so much, halve it or quarter it.
8 cups quartered green toamtoes
4 cloves garlic
1 large onion, chopped roughly
1 yellow bell pepper (this will help with the color)
1 jalapeno, more or less depending on your heat preference
3/4 teaspoon epazote (if you dont have this just omit)*
3/4 teaspoon celery seed
1 teaspoon cumin seeds**
1 tablespoon oil
In a dutch oven or a heavy bottomed pot, saute onion until translucent. Add cumin seeds and toast lightly. Then add all the rest of the ingredients. How easy is that. Cover the pot and let it all cook for about an hour. You want your green tomatoes to be tender. Puree once it is all cooked. Use salsa in recipes that call for salsa verde.
* epazote is an herb used in Mexican cooking. It is actually stink weed dried up. It is pretty powerful stuff so you just want to use a little. It really lends a lot of flavor and makes things taste mroe authentic.
** cumin seeds are worth any time it takes you to find them. They are nice and fresh and give lots of flavor. If you want them ground, just grind them in a spice grinder and voila, ground cumin with lots of POW.

Monday, September 14, 2009
Dippity Do Dah
 Dips to me are one of those fun foods like meat on a stick or potstickers. Throw some homemade crackers next to it and wow but if you are in a hurry certainly store bought crackers work very well too. Really they are just a vehicle to get that dip into your mouth.
 This is almost the same recipe as the one I received as part of the jam exchange. Here is the recipe:
Tomato Jam with a kick!
5 pound of ripened tomatoes, roma is the best but others will do
1 teaspoon chili pepper
2 teaspoons Tabasco sauce
3 cups of sugar
2 teaspoons kosher salt*
Combine all of the ingredients in a large sauce pan or a soup pot. Bring to a boil and reduce heat to a simmer. Let it cook down. When most of the liquid has evaporated start to stir almost constantly as it is prone to sticking at this point. You want the mixture to drop of the spoon in chunks rather than drips. It will also become glossy near the end.
*If you are canning, it is important to use kosher salt or salt that does NOT contain iodine.
 While this one is not so pretty, it is tastey. Mine comes out different every time. The key to great flavor is in the roasting.
Roasted Eggplant Dip (Baba Ganoush)
1 large eggplant
2 tablespoons tahini
2 tablespoons plain yogurt
2 cloves garlic, minced
1 to 2 tablespoons olive oil
salt to taste
Split eggplant in half. Place skin isde up on a baking sheet. Roast in a 375 F oven until it is soft. When you touch it with a wooden spoon it should depress. Remove from oven and let cool so that you are bale to handle it comfortably.
In a processor, mince the garlic. Add eggplant, yogurt, tahini, salt and olive oil. Regrigerate. Mixture will set up quite a bit after it has been refrigerated.

Lemon Clam Dip
2 cans minced clams, drained, reserving juice
1 - 2 tablespoon of reserved juice from the clams
1 - 8 oz. package cream cheese, room temp
1 tablespoon lemon juice
1 clove garlic, minced
2 tablespoons chives, chopped
1/4 teaspoon Tabasco sauce
1/4 teaspoon black pepper
1/4 teaspoon salt
2 tablespoons sour cream
Beat cream cheese and mix in sour cream, tabasco, salt and pepper, lemon juice and clam juice. For a thicker dip skip the juice or reduce them. Fold in chives, garlic and minced clams. Refrigerate to set at least an hour or so before using. For best results let dip sit overnight to develop the flavors.
Saturday, September 27, 2008
DARING BAKER LAVASH
 The Daring Bakers strike again. This time with a savory Vegan dish. Now how cool is that? It was a nice break from buttercream, although I really can't complain about buttercream. And you know something? Lavash has been on my to do list for quite sometime. Why did I wait so long? Put forth a little effort and you are rewarded with some fresh crunchiness! At a low price, I might add. The red in the picture is Mark Bittman's Tomato Jam. Click here for the recipe. It was fabulous. It was a hit at the picnic that I took it to!
 The lavash was amazing. It is a versatil creature! So many things you can do to it. Here I sprinkled on za'tar. Za'tar is a spice blend. There are many variations out there but this particular one has Mediterranean thyme, sumac (a lemony taste) and sesame seeds. I have seen ones with hazelnuts in them too. THe recipe for the lavash is below.
And finally the skordalia. Skordalia is a Greek dip. It is very tastey. I made a few changes to the recipe and would make a few more the next time.
Thank you to Shelly from Musings from the Fishbowl. This was a fabulous pick! Many of the DB's also did a gluten free variety of these crackers. So go and check them out.
Skordalia
Lipsmacking Goodness's Interpretation
The Orginal recipe
24 ounces potatoes
1/3 cup walnuts, toasted and peeled
5 garlic cloves
1 cup extra virgin olive oil
1/3 cup lemon juice
s and p to taste
Peel and cut potatoes. Place in sauce pan with about a teaspoon salt and boil until tender.
In a processor, blend garlic until minced, add walnuts and blend until fine. Add potatoes and pulse. You will notice that the potatoes become very glutious as you process them, thats how you want it. Add lemon juice, salt and pepper. While processor runs add olive oil in a stream.
LAVASH
Recipe Reference: The Bread Baker's Apprentice: Mastering The Art of Extraordinary Bread, by Peter Reinhart
The key to a crisp lavash,...is to roll out the dough paper-thin. The sheet can be cut into crackers in advance or snapped into shards after baking. The shards make a nice presentation when arranged in baskets.
Makes 1 sheet pan of crackers
* 1 1/2 cups (6.75 oz) unbleached bread flour
* 1/2 tsp (.13 oz) salt
* 1/2 tsp (.055 oz) instant yeast
* 1 Tb (.75 oz) sugar
* 1 Tb (.5 oz) vegetable oil
* 1/3 to 1/2 cup + 2 Tb (3 to 4 oz) water, at room temperature
1. In a mixing bowl, stir together the flour, salt yeast, sugar, oil, and just enough water to bring everything together into a ball. You may not need the full 1/2 cup + 2 Tb of water, but be prepared to use it all if needed.
2. Sprinkle some flour on the counter and transfer the dough to the counter. Knead for about 10 minutes, or until the ingredients are evenly distributed. The dough should pass the windowpane test and register 77 degrees to 81 degrees Fahrenheit. The dough should be firm, satiny to the touch, not tacky, and supple enough to stretch when pulled. Lightly oil a bowl and transfer the dough to the bowl, rolling it around to coat it with oil. Cover the bowl with plastic wrap.
3. Ferment at room temperature for 90 minutes, or until the dough doubles in size. (You can also retard the dough overnight in the refrigerator immediately after kneading or mixing).
4. Mist the counter lightly with spray oil and transfer the dough to the counter. Press the dough into a square with your hand and dust the top of the dough lightly with flour. Roll it out with a rolling pin into a paper thin sheet about 15 inches by 12 inches. You may have to stop from time to time so that the gluten can relax. At these times, lift the dough from the counter and wave it a little, and then lay it back down. Cover it with a towel or plastic wrap while it relaxes. When it is the desired thinness, let the dough relax for 5 minutes. Line a sheet pan with baking parchment. Carefully lift the sheet of dough and lay it on the parchment. If it overlaps the edge of the pan, snip off the excess with scissors.
5. Preheat the oven to 350 degrees Fahrenheit with the oven rack on the middle shelf. Mist the top of the dough with water and sprinkle a covering of za'tar. Be careful with spices and salt - a little goes a long way. If you want to precut the cracker, use a pizza cutter (rolling blade) and cut diamonds or rectangles in the dough. You do not need to separate the pieces, as they will snap apart after baking. If you want to make shards, bake the sheet of dough without cutting it first.
5. Bake for 15 to 20 minutes, or until the crackers begin to brown evenly across the top (the time will depend on how thinly and evenly you rolled the dough).
6. When the crackers are baked, remove the pan from the oven and let them cool in the pan for about 10 minutes. You can then snap them apart or snap off shards and serve.
Monday, July 1, 2013
South Western Salad with Pineapple Dressing

Most of the time when I want some recipe or have ingredients to use I do a search. I either find what I am looking for or I end up combining a bunch of ideas. This time I could not find anything for the ingredients that I wanted to use. So, I created my own. Again, salad dressing is not difficult. And with a little bit of effort you get a big return. You could do what I did here with other jams as well- say apricot for instance.

Southwestern Chop Chop Salad
dressing:
1 half pint pineapple jam, could substitute apricot jam
1 tablespoon white wine vinegar
2 tablespoons lemon juice
1 teaspoon cumin
1/2 teaspoon salt
2 cloves garlic
1/2 cup oil
salad:
1 can corn or 2 cups frozen corn
1 tomato chopped
4 scallions, sliced
1 can or 2 cups black beans
5 radishes sliced small
4 cups mesculin mix or romaine
Combine all the salad ingredients in a large salad bowl.
In a blender or a processor add garlic and chop fine before adding other ingredients. Add jam and blend until it is smooth. Add white wine vinegar, lemon juice, cumin, and salt. Then while the blender/processor is running add oil and let it whip until it looks totally blended and creamy.
Toss salad with dressing.
Friday, October 17, 2008
RISO FRITTELLA ON A SHOESTRING BUDGET
 We are all watching our dollars these days. I know it may sound stupid but I dont like to hear about the DOW. I just prefer to have my rose colored glasses on. Oh, that's not to say that I havent been thinking of ways to watch my spending because I most certainly have. It just means that I am scared to death of our Country's current situation and what it will mean for my family and my children. I try to focus on the here and now and not try to look at it too much. eeeeeeeeeeeeeeeeeeeeeek! Okay breathe, in and out, in and out.
So here is one of the things I cooked up that will help to keep the money in our pockets a little longer. Cheesy, rice patties. These are a lot like arancini only they are in patty form. The idea is the same. They are really tastey but that doesn't mean that a little mango chutney wouldnt taste great on them. Or tomato jam. I'm thinking it would. I liked it with basil and tomatoes.
RISO FRITTELA / RICE FRITTERS
Lori's Lipsmacking Goodness Original
2 cups cooked rice
2 eggs
1/2 teaspoon granulated garlic or 1 clove garlic, minced
1/2 cup peccorino romano or parmesan or asiago
1/2 teaspoon salt
olive oil for frying
Combine all ingredients. Form little round discs and fry in olive oil, until lightly golden. You can make small ones and use as an appetizer or make larger ones for a meal.
Saturday, October 26, 2013
PB Boulangerie
 |
| Our classic summer salad- tomatoes, olive oil, garlic, basil/oregano (depending on who is making it), salt and pepper. Simple summer goodness. And my secret ingredient... ground allspice- a little bit. You do not taste it but it enhances the flavors of the tomatoes. |
I read about this bakery from Dawn over at Vanilla Sugar blog. I had to stop there. Two native Parisians who came to America and started this French Bakery, PB Boulangerie.

Amazing bread. We bought the Pain aux Olives, we left, tried a bit of it in the parking lot and loved it. My husband, who was wondering why we were making this a stop on our outing, insisted we stop back later and get another loaf. Ha! See, if a foodie suggested somewhere, I take it seriously. I was thinking the whole time, we probably are not going to stop back, he'll forget or whatever. Oh no, we drove right to it after we had gone to Race Point in Province town. He thought it would be awesome to have some nice bread to go with some tomato salad and olive oil. He went into the bakery and came out with that huge loaf. That was our breakfast in the mornings, tomato salad and or toast with peach amaretto jam that I brought with me. Heaven!
Here are some images from the bakery. Now, you know I will be trying to recreate some of that amazing bread here in my kitchen. I will do my best.


 |
| Clearly I am duck footed. |


